Breastmilk Bead Tutorial – making breastmilk beads with an advanced resin technique called The Beachball Resin Technique. This tutorial just one of over 120 lessons on our Advanced Breastmilk Jewellery Course. We also have two free keepsake jewellery making courses (breastmilk and memorial jewellery) click here to register and take our courses!
I’m using one of our blank bead cores which are really easy to fit, you don’t need glue, and they cover a wide sanding area making your bead look more professional than using glue-in bead inserts (also known as grommets or charm bead findings). The breastmilk kit option for the bead core comes with a bead mould, so you can make a couple of beads then choose your favourite to add a bead core to.
All of our settings are available as breastmilk kits as an add-on, you get the supplies included or you can purchase them separately for larger quantities or if you already have some of the supplies. If you want to make two beads, for example, order two cores and one kit. A sachet of breastmilk powder makes more than enough for a dozen beads!
Breastmilk Bead With Beachball Resin Technique Tutorial Video
Here’s the full transcript of the vlog. Firstly, when making breastmilk jewellery send your client a breastmilk sending kit, see this blog How To Make Sending Kits for advice on instructing clients on sending in breastmilk, here are the sending kit instructions templates and here are the 5ml Breastmilk Sending Tubes we sell. We had sent the client a kit in the post to send in two tubes of breastmilk, each with 5ml of milk, around a third of an ounce total. I like to suggest that the client keeps another 10 mil in their freezer in case it’s lost in the post
You’ll need the following supplies

After your first order you’ll receive a reasonable 15% off future purchases
- your client’s breastmilk
- a bead core breastmilk kit – or buy the following supplies separately
- UV resin
- Vinyl gloves
- a dust mask
- Label backing paper
- tiny spoon
- Cocktail sticks
- Any sparkles you like
- A medium bead mould
- Side cutting pliers
Tools and Equipment
- a white pestle and mortar to finely grind the milk
- LED UV lamp to work with UV resin
- You can also use epoxy resin instead of UV resin and a UV lamp for these pieces but you will need to wait for the resin to cure between layers which can take days
- side cutting pliers
- a wooden doming block or a folded cloth
- a doming punch set or you can use the ball bearing included with the bead core and a small hammer, both methods are shown in depth in this video:
RECEIVING BREASTMILK
Before starting, I preserved and dried the client’s milk, being careful to keep it labelled, have a look at our last tutorial Breastmilk Bubble Ring and Rainbow Necklace for some photos of the milk grinding stages.
Making a Breastmilk Bead
One method you can use is to make the breastmilk into a paste. Put a line of UV resin on label backing paper then add a spoonful of the super finely ground milk powder and combine to make a milk paste. Take your mould and fill with clear resin and use a cocktail stick to transfer a tiny bit of the milk paste then gradually incorporate it working round and round. In a minute we’ll look at the pattern to make with the milk paste called The Beachball Resin Technique. Squeeze out any extra resin and transfer back to the label backing paper
Another way to make a breastmilk bead is to fill the mould with clear resin then spoon the breastmilk powder directly on top. Use the cocktail stick to push it into the clear resin. I’m also making a third bead for the client with some basilisk green resin sparkle mix. You can add teeny bits of coloured sparkle mix to just tint the milk or more to add a bold colour like I’m doing here. You can add gold filled leaf to give the bead a touch of bling or to represent one year breastfeeding, known as golden boobies. Cure the beads under the UV lamp for 99 seconds on a low heat then allow them to cool before repeating again to make sure they’re completely cured.
Beachball Resin Technique for Beads
You can use the breastmilk powder to create a beautiful effect I call the Beachball Resin Technique. Pull the colour out in swipes from the core like I’ve shown in this diagram
You can see the swipes are like spokes on a cog and the finished bead looks like a beachball. This effect gives the bead depth and luminosity, and is great with UV resin because the clear resin between the spokes can cure properly. If you make a UV resin bead opaque there’s a chance the light can’t penetrate all the way to the core and the coloured resin might remain liquid inside. To finish the beads remove the excess from the top and gently push them out of the mould. My silicone is very stretchy so it won’t break even if you pull it wide to get the beads out
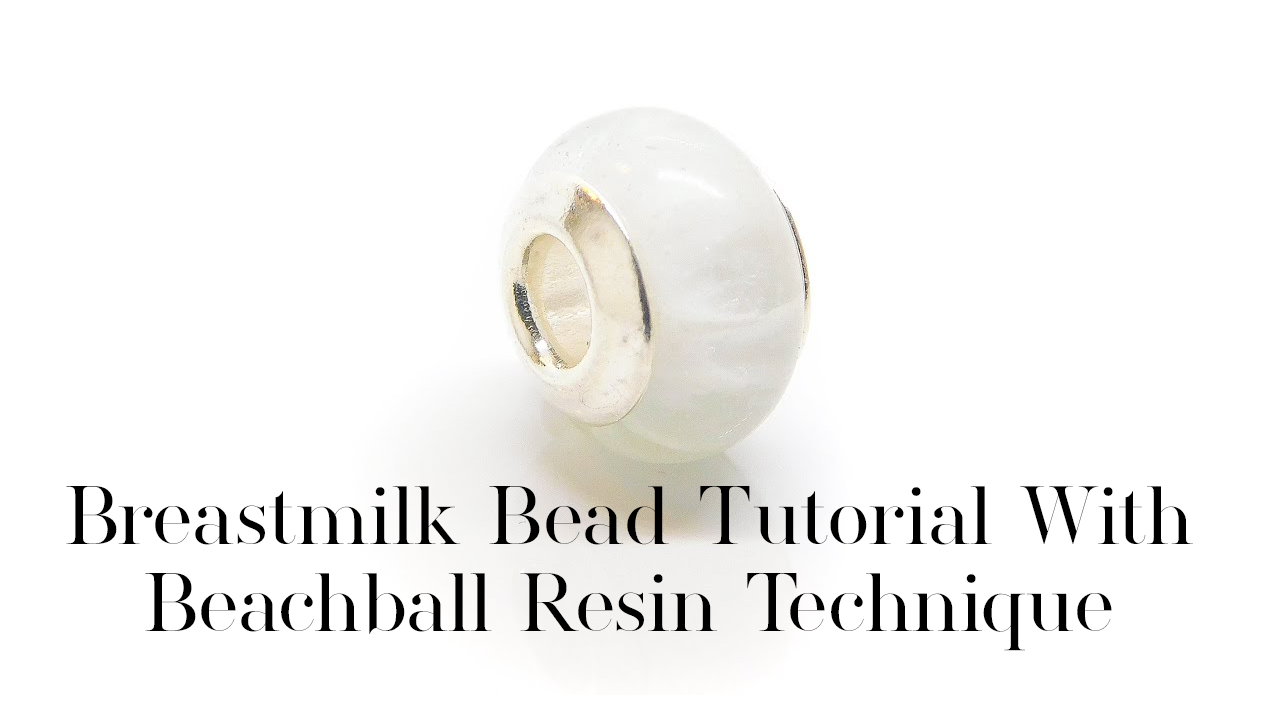
Finishing a Breastmilk Bead
Remove the excess resin from the pouring spouts with side cutting pliers. You might find it easier to use a carbide burr bit like this in a rotary tool to remove excess resin from the top. When you’re finished, give them a wipe over before sending the client a proof photo. Once you know they’re happy with the bead you can add a bead core. Today I’m using a wooden doming block to stabilise the bead and using a doming punch set to flare the core.
You can use the 6mm ball bearing if you don’t have a doming punch and rest the bead on a piece of fabric. I have another video showing you how to do this but the doming punches are much easier to use and give more consistent results. The long core, part A, should show a little above the back washer, part B, so there’s some silver to secure the core in place. If your bead is too thick, there might not be enough to flare over
But if your bead is too thin, there might be too much silver to flare easily so make sure you’re using a compatible mould. Work your way up from a 6mm doming punch to larger sizes until the core is secure in the bead


Now relax and do some crafting. Don’t forget, this tutorial just one of over 120 lessons on our Advanced Breastmilk Jewellery Course. We also have two free keepsake jewellery making courses (breastmilk and memorial jewellery) click here to register and take our courses!
Nikki Kamminga
pronouns – they/them
