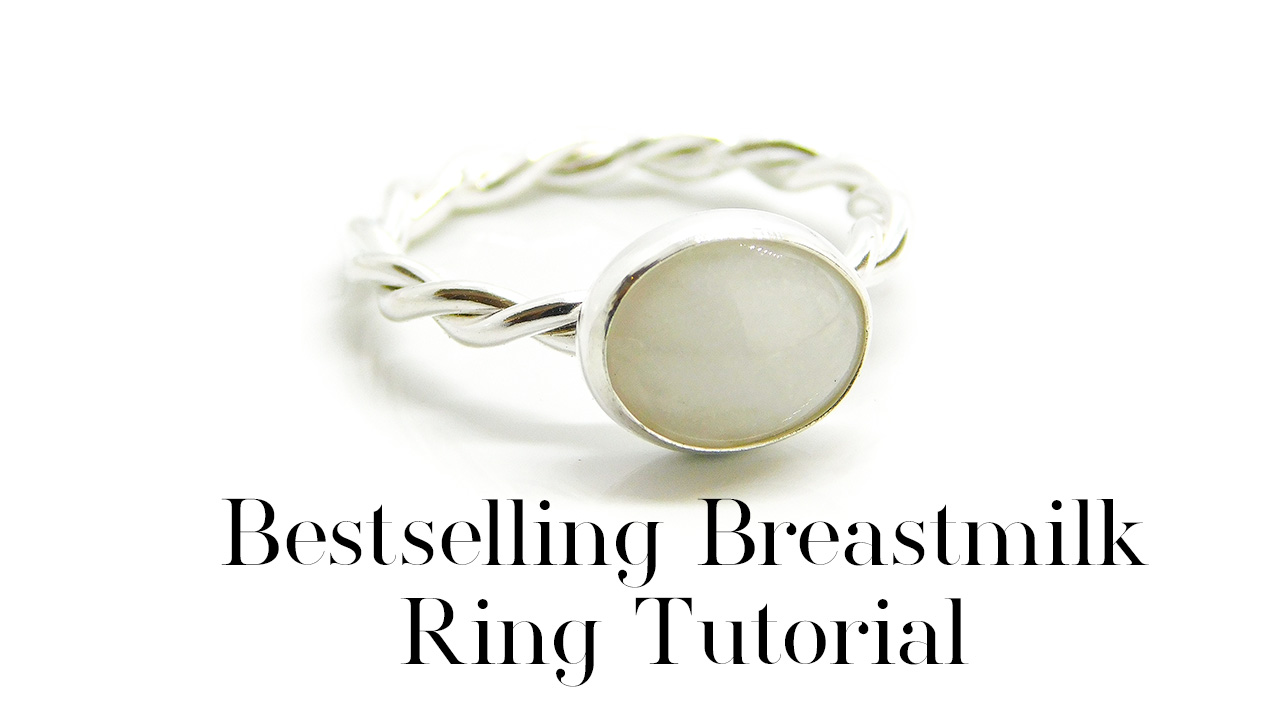
Bestselling Breastmilk Ring Tutorial – this is my bestselling design on Tree of Opals, and today I’m showing you how to do this beautiful design yourself with everything you need available to purchase here. This tutorial shows you making breastmilk stones for jewellery using a cabochon stone technique compared to doing a direct pour. I have two free courses to help people learn how to make breastmilk and memorial jewellery – click here to register and take them!
I’m using one of our twisted band rings which are great for rubbing over a stone or direct pouring. The breastmilk kit option for the ring comes with a single mould, so you can make a couple of cabochons then choose your favourite to set in the setting or you can pour the milk paste and resin directly into the ring.
Bestselling Breastmilk Ring Tutorial Video
You’ll need the following supplies
- a breastmilk ring kit (all of our rings are available as breastmilk kits)
Included in the breastmilk kit is: a single mould – vinyl gloves – pearlescent sparkle mix – a dust mask – label backing paper – some sandpaper – 3 cocktail sticks – 10g UV resin – breastmilk preservation powder
You might also need the following:
- pestle and mortar
- UV top coat
- ring clamp
- A curved burnisher
- LED UV to
- silver polishing cloth
- UV LED torch** or a good UV lamp for professionals
- 200g bottle of Padico Star Drop
- biodegradable cleaning wipes cut into smaller squares
You’ll also need your client’s breastmilk for this Bestselling Breastmilk Ring Tutorial. We ask them to only send 15ml or half an ounce, in the two tubes we send them. That way, if it’s lost in the post they can send a little more. We sell wholesale sending kit supplies such as breastmilk sending tubes here. Learn more in our free breastmilk jewellery making course.
Hi, I’m Nikki Lovegrove from Tree of Opals and Keepsaker Supplies. I teach people for free how to make keepsakes like breastmilk jewellery.
In this video I’ll be using UV resin to make breastmilk stones for my bestselling twisted band ring. I’ve been selling this design on Tree of Opals for around 8 years and it’s the most highly requested ring. I love the simplicity of the handmade band, and the stone is designed to be the most secure it can be for a larger size stone. If you’d like me to make you one, just visit TreeOfOpals.com and click on Breastmilk Rings. Links to all the supplies are above!
I have videos showing you how to grind the dried milk paste into a fine powder too so I’ve skipped all that for this video and have my client’s milk ready to go. I’m just re-grinding it so it’s super fine.

Add a drop of clear resin to a piece of label backing paper and add some of the preserved breastmilk powder. Mix together well so it’s an opaque paste. Prepare the mould by adding a drop of clear resin and remove any air bubbles. Now add a tiny amount of the breastmilk resin and swirl in. You can mix it in completely but I like the swirls! Cure these for 99 seconds with a low heat setting if you have it, or 60 seconds in a regular UV lamp if not.
For the second layer, I add a bit of the milk resin but then decide to add a bit of clear resin too. Swirl together a bit more than you did for the previous layer and cure again. Mix up a bit more breastmilk resin if you need to, like I’m doing here. Use if for the third layer and I didn’t add any more clear resin here but it’s totally up to you. It depends on the thickness of the layers and the look you’re trying to achieve. Cure again
The last layer is always clear resin and I cure it three times, allowing to cool a bit between each blast in the lamp. Now you can prepare the ring for adding the cabochon stone. Place it in a wooden ring clamp like this after you check the size and style are correct. You can use scissors to trim the edges of the stone if you have them.
Remove the stones from the mould when they’re totally cold. If you’re making the ring for a client, you can send them a photo to let them pick their favourite stone. You could offer to make an additional piece for the client if you have a spare setting the same size, and I always return the unused stones either way.
Trim away the excess resin with scissors or side cutting pliers. The back of this stone is a bit uneven so I file it flat with sandpaper, being careful not to scratch the shiny top. You can use a diamond file like this, if you prefer. Now check the stone fits nicely in the ring.
If the stone is a bit thin, it will sit too low in the bezel cup and be harder to secure in place. You can raise it up by adding a bit of flat plastic like this. Draw around the stone with an Ultra Fine Sharpie then cut inside the line. It doesn’t have to be perfect. Put the piece of plastic into the bezel cup and place the stone on top. I decided that the plastic made the stone a bit too tall so I took it back out again. There was a tiny smudge on the stone, meaning I need to replace the mould, so I decided to top coat it. Place it on a bit of white tack on an upside down ramekin and apply a thin layer of UV top coat which we also sell on KeepsakerSupplies.com
Cure a few times and allow to cool. Put the stone back in the bezel cup and use a curved burnisher to rub over the silver to secure the stone. Press in the edges at 12o’clock, 6o’clock, 3o’clock then 9o’clock, then the corners, then smooth down any ridges. I like to finish with the back of the burnisher then use a silver polishing cloth before I take photos.
I’m so grateful for my client’s permission to film this anonymously as part of my series of courses to make breastmilk and memorial jewellery. Now relax and do some crafting
Please note, this blog contains affiliate links, meaning I receive a small income based on your purchases from Amazon and Etsy etc. This affiliate income is really helpful to me to support my family and if you’d like to know how I set it all up please get in touch (blogs coming soon!).
Nikki

TikTok videos

TikTok
@keepsakersuppliesBestselling Breastmilk Ring Tutorial – this is my bestselling design on Tree of Opals, and today I’m showing you how to do this beautiful design yourself with everything you need available to purchase here. This tutorial shows you making breastmilk stones for jewellery using a cabochon stone technique compared to doing a direct pour. I have two free courses to help people learn how to make breastmilk and memorial jewellery
