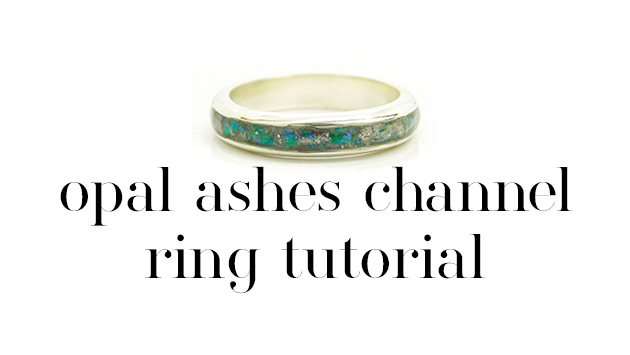
Easy Opal Ashes Channel Ring Tutorial with green opal flecks – making bereavement and cremation jewellery using a direct pour technique. This technique is ideal for our channel rings here which are anti-tarnish solid silver. You don’t need a lathe for this tutorial!
Opal Ashes Channel Ring Tutorial Video
@keepsakersupplies♬ original sound – Keepsaker Supplies
Here’s the transcript. After your first order you’ll receive a reasonable 15%* off future purchases. We have several courses here including some free to help you learn more about making bereavement and cremation jewelry such as a cremation ring.
You’ll need the following supplies
one of our DIY ashes ring kits
the ashes/hair version of the kits contain:
- a ring setting – this is one of our channel rings
- a practice setting for direct pour (checking colour etc)
- vinyl gloves
- resin sparkle mix (you can use eyeshadow for a custom colour!)
- a dust mask
- label backing paper
- some sandpaper
- 3 cocktail sticks
- 10g UV resin
You’ll also need your client’s cremation ashes for this Easy Opal Ashes Channel Ring Tutorial. We ask them to only send half a teaspoonful! That way, if it’s lost in the post they can send a little more.
Opal Ashes Channel Ring
These channel rings are made from anti-tarnish solid Argentium silver that’s a little purer than sterling. I have a 200g bottle of Padico Star Drop which is my favourite UV resin, so I’m using that today along with the new Dolphin Silver resin sparkle mix which will be my background colour. Put a small amount of resin and sparkle mix on a piece of label backing paper
These are my cat, Husky’s ashes and they have really large pieces of bone. Some crematoria have older cremulators, the machines which grind the bones into powder, and you can get bigger pieces which I don’t think look as nice in jewellery. You can grind the ashes a little more in a pestle and mortar if you want to. Mix the ashes with the sparkle mix and resin
Triple check your ring is the correct size. As it’s a wider band ring it’s best to go a bit bigger than your client’s finger. If your client is a UK size O or a US 7, then I’d recommend suggesting they go for a size P or 7.5! I’m using a silicone ring stick here but you can use a ring sizing stick or even some rolled up cardboard. Add the sparkly ash resin in a very thin layer, being careful not to let it go over the edge
Cure it under your UV lamp for about 20 seconds whilst turning constantly. Whenever I use a UV lamp, I use a piece of cardboard covered with tin foil to protect myself from UV damage. Prop the mandrel on a bowl so that it doesn’t touch the lamp and cure at least once on each side. You don’t need a low heat setting
For the second layer I’m adding a thin layer of the ashes and sparkle mix resin then sprinkling on some of these gorgeous mint synthetic opal pieces. Cure again the same way as before. The third layer should be clear resin and I’m adding a little more of the mint opal pieces and a few grains of ashes. Try to be careful so that nothing pokes past the edge of the ring and cure again.
The fourth layer will be just clear resin or some top coat and if you’ve been careful and nothing is poking out, your ring is finished! If, however, you have some ashes or opal disturbing the surface then it’s easy to fix by sanding it back. I use one of these magic silver polishing sticks (link in the description). The green side is about 2000 grit and removes the extra. The white side is about 6000 grit and shines up the silver again. Once you’re happy, add a layer of clear resin or top coat and cure again.
I hope you’ve enjoyed this video, please subscribe to my channel and give this video a like to see more like it in the future. Do you like how this ring turned out? Have you been put off making channel rings in the past because people often use expensive equipment and do lots of sanding.
**Which UV Lamp To Use for Cremation Ash Jewellery
I’m using a 48w Sun3 lamp with a low heat setting but any UV lamp or torch will do when making memorial and keepsake resin jewellery. I don’t recommend you use daylight unless it’s very bright and sunny and you work in extremely thin layers. If you add too much pigment to cremation ring it won’t cure, I’ve had beads that you can crush in your fingertips made by new artists that added too much resin sparkle mix.
Now relax and do some crafting!
Please note, this Easy Cremation Ring Tutorial blog contains affiliate links, meaning I receive a small income based on your purchases from Amazon and Etsy etc. This affiliate income is really helpful to me to support my family and if you’d like to know how I set it all up please see my affiliate page here.
Nikki
*terms apply – some products aren’t included such as settings and findings, sorry.

[…] for this tutorial but if you have one, definitely use it for the sanding process. You can see our basic channel ring tutorial here and the advanced channel ring tutorial […]