How To Add Colour to Breastmilk Stones – Advanced UV Resin Jewellery Making. Making breastmilk stones with sparkle mixes, faux precious stones, alcohol inks and glitters. Keepsake jewellery using a mould to make a cabochon stone technique. You’ll find more info on preserving milk and making pieces with stones and direct pours in our Advanced Breastmilk Jewellery Course. I have created two free courses to help people learn how to make breastmilk and memorial jewellery – click here to register and take them! I’m using one of our solid silver crown oval necklace settings which are great for rubbing over a stone, which is also available in gold vermeil here, gold filled here or solid gold here by request. The breastmilk kit option for the necklace comes with a single mould, so you can make as many cabochons (stones) as you like. If you’d like me to make you a necklace or want to see how I list them on Tree of Opals here they are.
How To Add Colour to Breastmilk Stones Tutorial Video
TikTok
@keepsakersuppliesHow To Add Colour to Breastmilk Stones
After your first order you’ll receive a reasonable 15% off future purchases*. Firstly, when making breastmilk jewellery send your client a breastmilk sending kit, see this blog How To Make Sending Kits for advice on instructing clients on sending in breastmilk, here are the sending kit instructions templates and here are the 5ml Breastmilk Sending Tubes we sell. We hadn’t sent this client a kit in the post; he sent me a full bag of breastmilk, triple bagged, and the rest of the milk is in tubes in my freezer now as he gave permission to give it to my clients for practice. I like to suggest that the client keeps another 10 mil in their freezer in case it’s lost in the post
You’ll need the following supplies
one of our DIY breastmilk necklace kits the breastmilk version of the kits contain:
- a single silicone mould
- a necklace setting – this is one of our crown oval necklace settings
- vinyl gloves
- resin sparkle mix (you can use eyeshadows or singles)
- a dust mask
- label backing paper
- some sandpaper
- 3 cocktail sticks
- 10g UV resin
- breastmilk preservation powder
You’ll also need your client’s breastmilk for this project. We ask them to only send half an ounce (around 15ml)! That way, if it’s lost in the post they can send a little more. Tools and Equipment
- LED UV lamp**
- Padico Star Drop UV resin
- a tiny measuring spoon
- resin sparkle mix (orchid purple)
- opalescent flakes (lilac purple)
- Pearlescent sparkle mix (purple)
- crushed glass (amethyst glass)
- holographic flakes (indigo silver and violet silver)
- Padico UV Resin Jewel Colour Set (purple, red and blue alcohol inks)
- curved burnisher or a teaspoon
- solid silver chain
- silver polishing cloth
RECEIVING BREASTMILK Before starting, I preserved and dried the client’s milk, being careful to keep it labelled

Purple Breastmilk Stone Tutorial
Hi, I’m Nikki Lovegrove from Tree of Opals and Keepsaker Supplies. Today you’ll learn some advanced techniques for adding colour to cabochon stones. I’m using my client’s breastmilk but you can add cremation ashes or ground dried umbilical cord or placenta instead if you prefer. To add a first curl, just follow my lock of hair stone tutorials then use the colour techniques from this video.
The breastmilk is already preserved, dried and ground. You can learn to do this by watching my tutorial Preserving Breastmilk Part 1. Everything I’m using is available on my website KeepsakerSupplies.com This is an 18x13mm oval stone mould and I’m using Padico Star Drop UV resin, as always. The colours and additions I’m using are:
Orchid purple resin sparkle premixed with UV resin
Lilac purple opalescent flakes
Pearlescent purple sparkle mix
Indigo silver and violet silver holographic flakes
Amethyst glass coloured crushed glass for resin
Purple, red and blue alcohol inks from the Padico UV Resin Jewel Colour Set
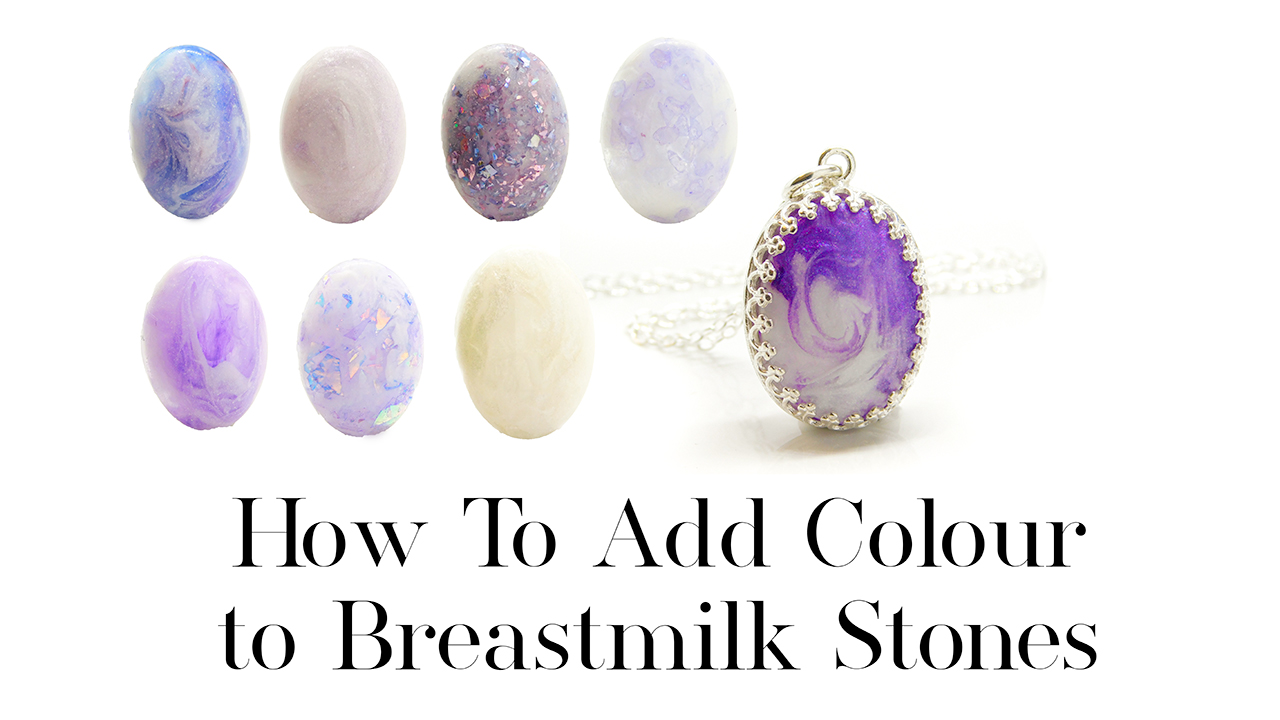
Make milk resin by mixing some clear resin and breastmilk powder on label backing paper, removing any bits of fluff. Add a little resin to the edge of the mould and use a cocktail stick to transfer some of the milk resin into it. Now mix some clear resin and the sparkle mix separately so it’s not so densely pigmented and transfer some alongside the milk resin in the mould. For stone two I’m adding a tiny spoonful of the opalescent flecks. Swirl both stones gently so the colour is focussed around the edges then cure for 99 seconds on a low heat setting or 60 seconds with a regular UV lamp.
Repeat for the second layer with a little more milk resin, pigment and sparkles this time. In the third layer, you should be trying to achieve opacity, meaning you can no longer see light coming through the stones. Be careful not to add too much pigment or the light won’t be able to penetrate; this is why we work in layers.
When it’s almost full, add a layer of clear resin to the back and cure a few times. Allow the stones to cool completely before you remove them from the mould. Meanwhile, mix up some more milk resin if you need to for the other stones. Then prepare the colours for stones three and four. You can make them all at the same time if you have extra moulds, to save time. I’m making a pearlescent purple and a pastel purple, which is a mixture of the pearlescent and the orchid purple. Use the same method as you did with the first stones working in layers to get a pretty swirl and good coverage.
Stones five and six were the holographic flecks and the crushed glass, which I added just as I did the opalescent flecks in stone two. Seven was purple alcohol ink and eight was blue and red alcohol ink swirled together. I will be doing a tutorial on alcohol inks soon and I lost the footage of these four stones!
Make sure you dome the back of all the stones with clear resin, cure a few times and cool completely. Snip off the excess with some side cutting pliers or scissors, or you can just pick it off with your fingers if it’s thin like this.
I sent my client a photo of all eight stones and she chose number one to be set in the crown point oval setting. Her main piece is a breastmilk stone with birthstones and floral elements which I will show you in another tutorial soon. Thank you so much to my client Hannah for her permission to film.
I have lots of videos showing you how to rub over the points of a crown setting like this so please watch one for tips but you can use a curved burnisher or even a teaspoon.
Don’t forget, I’ve linked to all the supplies I’m using in the video description or there’s a link in my bio, or you can just go to KeepsakerSupplies.com
Now relax and do some crafting


