How To Make A Placenta Orb with Beachball Resin Technique tutorial. Learn how to make keepsake and memorial jewellery using a silicone mould. I’m also showing you how to wire wrap a headpin for a sphere, orb or pearl. Recently I’ve created two free courses to help people learn how to make breastmilk and memorial jewellery – click here to register and take them!
Use a nice shiny mould to try to prevent needing a UV top coat, and make sure the colour isn’t too opaque if you’re working with UV so it cures in the middle.
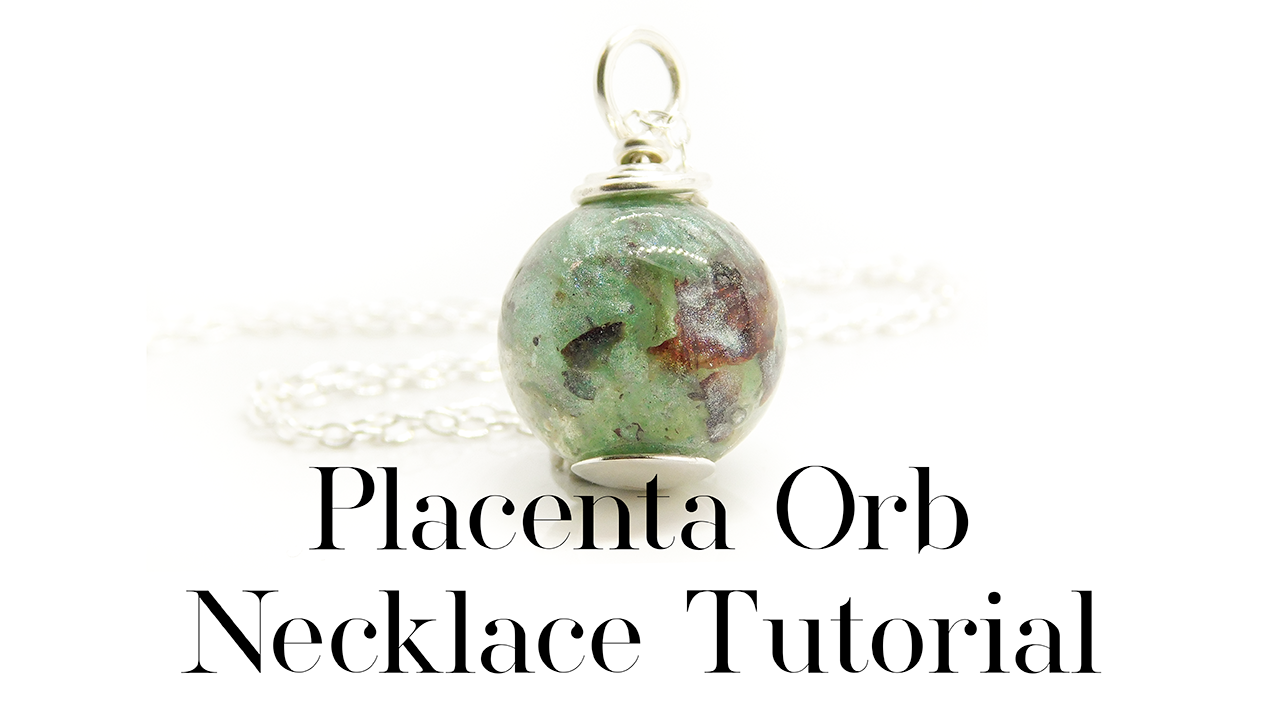
How To Make A Placenta Orb with Beachball Resin Technique Tutorial Video
@keepsakersuppliesPlacenta Orb Necklace Tutorial
You’ll need the following supplies
-
- the client’s placenta (or umbilical cord or ashes)
- Silver Orb Necklace Kit (this includes an 11mm sphere mould, a silver domed headpin, resin sparkle mix (I’m using angelic aqua and a little aegean blue in this video), 3 cocktail sticks, gloves, dust mask, label backing paper, 10g bottle of UV resin, 1mm drillbit, some sandpaper)
- tiny spoon
Tools and Equipment
- pestle and mortar
- LED UV lamp to work with UV resin
- a USB drill
- round nose pliers
- wire cutting pliers (optional)
RECEIVING PLACENTA
*You can check this blog How To Make Sending Kits for advice on instructing clients on sending in placenta, here are the sending kit instructions templates and here are the 3ml Sending Pots we sell. You can ask someone to send a placenta capsule or half fill a pot if it’s not already ground. Please make sure it’s already dehydrated. If it’s for a memorial piece and they don’t have it dried already, put them in touch with a placenta encapsulation specialist.
Hi I’m Nikki Lovegrove and welcome to the Keepsaker Supplies tutorial channel
Today I’m going to show you how to make these wire wrapped resin placenta orbs from start to finish with a close-up of the wire wrapping process.
———
This video is dedicated to Maggie Merrick, a baby who passed away. I’m very grateful to her family for giving me permission to film this to help my students. I received her placenta dehydrated and the first step is to cut it into smaller pieces.
I use side cutting pliers here and you can use scissors if you prefer. Be careful that the pieces don’t fly away, especially if it’s a precious memorial piece. Now you can grind it in a pestle and mortar to get smaller pieces.
Prepare the silicone mould by overfilling with clear resin. I’m using a crystal clear 11mm sphere mould. We make these by hand and you will need clear silicone if you’re working with UV resin like this, so that the light can penetrate and cure the resin. It’s not necessary to use a clear mould if you’re working with epoxy resin but it’s still a good idea, so that you can see the placement of the inclusions and colours.
You can add the colour first, this is premixed resin sparkle mix which is stored in opaque black pots to stop the resin curing. I’m using our Angelic Aqua with a touch of the Basilisk Green.
Next, you will add some of the ground placenta. I’ve added about three tiny spoons full and the amount you add is up to you.
Use a cocktail stick to press the colour and placenta down into the centre of the orb. Try not to let it get to the edges yet. I’ve slowed this bit down so you can see it up close.
You can make two or three with different amounts of colour and placenta and choose your favourite when they’re cured.
Now use the beachball resin technique, which I showed you in my ashes orb video, to swipe some colour up to the edges. The UV can still penetrate between the swipes to cure the centre of the orb. If you just stir the colour in, then the centre won’t cure properly and when you drill through the orb, the resin will dribble out! It would be ok with epoxy but you might still want to use this technique because it looks pretty, like a glass bead.
Cure the orb under a UV lamp for 99 seconds on a low heat setting if you have it, or 60 seconds under a regular UV lamp. We sell the low heat lamps on KeepsakerSupplies.com along with the kit to make an orb like this.
I like to cure orbs and beads at least three or four times each, turning after each cure and allowing them to cool in between cures. Whilst they’re in, put away the client’s inclusions and clean your workstation.
Don’t be tempted to touch the orbs too soon when they come out from the lamp. They must be completely cold. Then you can remove them from the mould.
To finish an orb, cut away the excess with side cutting pliers then sand with a diamond file. If it has a little dip in it, you can refinish it. Just rest it on some WhiteTack and add a drop of resin and cure to dome it.
I’m using a pearl drill here to make sure the hole goes straight through the centre but you can just use a 1mm drill bit in an electric drill, a USB drill or even an Archimedes drill. It’s a good idea to put a Sharpie dot where you want the hole to start and finish and aim carefully to follow this Placenta Orb Necklace Tutorial.
Put the headpin through, if it comes out the end with liquid on that means it’s not fully cured in the centre.
You’ll need a headpin wide enough to cover the pouring hole and we have these solid silver, 9ct yellow or rose gold domed deadpins on KeepsakerSupplies.com
————-
You can use specific multisize loop making pliers, like these, to form the loop, but I prefer to use round nose pliers and they’re more affordable.
Use the pliers at the end (the smallest bit) to bend back the headpin to 45°. Do this a little above the base, this leaves a little room for the excess to wrap around after you make the loop. Now move the pliers up, like this, so that you can form the loop directly above the orb.
Move the pliers down so that the loop will be a little bigger. It needs to be big enough for the chain to get through later, so you can measure the chain to find the width needed for the loop!
Bend the headpin back round the pliers to form just over half of a loop. Move the pliers around so you can then pull the rest of the headpin wire round to form the full loop. Now pull the wire back like this, then bring it round to begin wrapping.
Continue to wrap it around, working down to the base, until you run out of wire. The last little bit is hard to bend and springs back. Push it as far as you can with your thumb and fingers then take it off the pliers. It should look a bit like this.
To snip off the excess I like to hold the loop firmly and pull the extra wire away a little with my thumb. I like to snip it off just where the bend finishes, before the straight end. You can tuck the wire in with the round nose pliers but I prefer to use flat pliers like this for a better grip.
Tuck the cut wire under the rest then work your way around squeezing it so it’s hidden. Switch to the round nose pliers if you like. Add a chain to make a necklace. If you’ve made the loop too small for the loop on the chain, you can flatten the loop on the chain with the flat nose pliers like this. Put it through the loop on the orb then you can re-form it into a round shape with the end of the round nose pliers.
You could alternatively add different hardwear such as a large splitring to make a keyring, or a dangle charm setting for Pandora style European bracelets or a carabiner for Thomas Sabo style large link bracelets.
Let me know in the comments if you’d like to see more videos like this and don’t forget I’ve linked to the blog and all the supplies you need down below. Now relax and do some crafting.
If you have any questions at all about this video, please comment below or on the video. I’m so grateful to anyone who can subscribe to my YouTube because it really helps me to be able to bring you more tutorials.
Nikki


[…] how to make an orb with placenta and wire wrap it in Placenta Orb Necklace Tutorial on Nikki’s teaching business Keepsaker […]