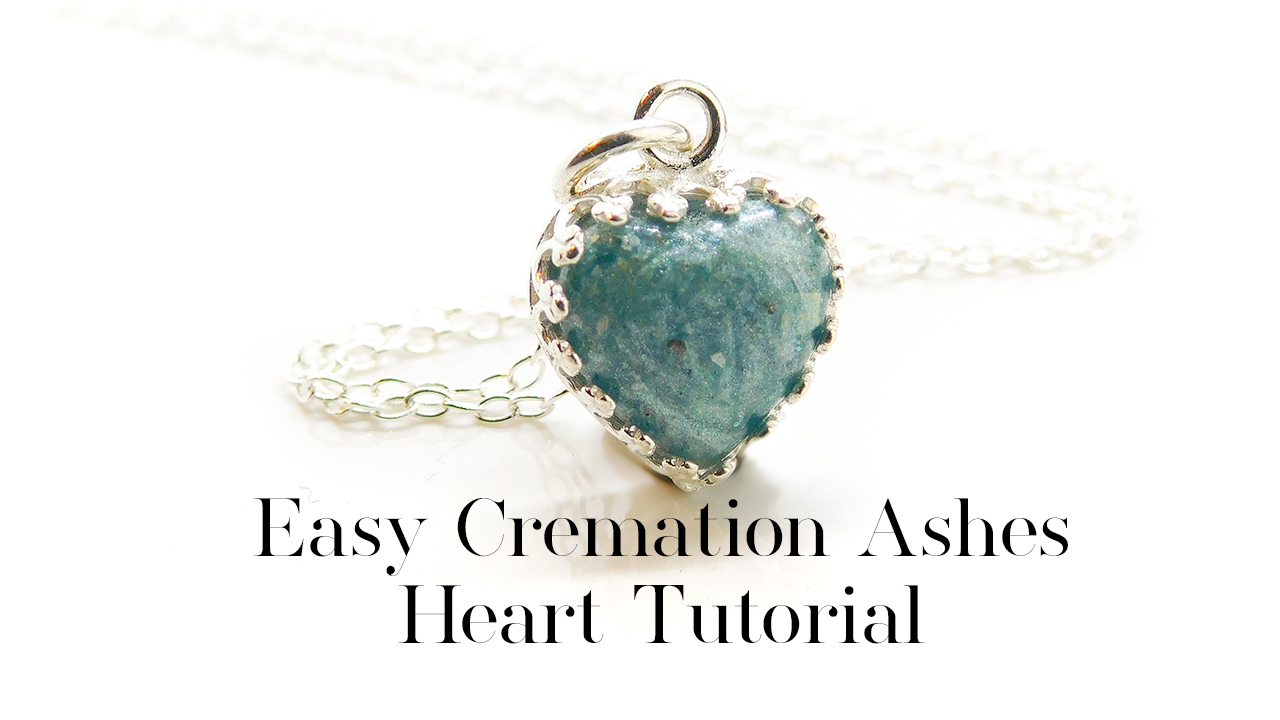
Easy Cremation Ashes Heart Tutorial – making a necklace with a DIY kit. Keepsake jewellery using a mould to make a cabochon stone technique. In the video my daughter Hannah shows you how to work with ashes, and you’ll find more info in our Advanced Memorial Jewellery Course. Recently I’ve created two free courses to help people learn how to make breastmilk and memorial jewellery – click here to register and take them!
I’m using one of our solid silver heart settings which are great for rubbing over a stone. It’s also available in gold plated silver (called vermeil) here. The Memorial Kit option for the necklace comes with a single mould, so you can make a couple of cabochons then choose your favourite to set in the setting.
This is the easiest project you can start with and you can personalise it by adding a forget me not flower, a lock of hair or fur, gold leaf or birthstone flecks.
Easy Cremation Ashes Heart Tutorial
@keepsakersupplies Easy Cremation Ashes Heart Tutorial – by my 7 year old daughter Hannah #2023 ♬ original sound – Keepsaker Supplies
Accessability – here’s the GoogleDocs text file of the video transcript.
You’ll need the following supplies
All of our necklaces are available as ashes and fur kits which contain everything but the UV lamp and chain:
- solid silver heart setting as a Memorial Kit including
Some gloves
Label backing paper
Sandpaper
A dust mask
UV resin
Sparkle mix
The silver necklace setting
Some cocktail sticks
And a silicone mould - necklace chain
- a UV lamp like our SUN3 48w LED UV lamp
- teaspoon

Rabbit Fur Stone and Packaging Tutorial
Easy Cremation Ashes Heart Tutorial Video
Hi, I’m Hannah Kamminga and today I’m showing you how to make a cremation ashes heart necklace.
I’m using one of the DIY kits my mummy sells on her website KeepsakerSupplies.com
There’s a link in the description or a Linktree in my bio
These small heart settings are under £30 with a kit to make cremation ashes or hair jewellery. That’s about $35 US dollars
All you need at home is a teaspoon and a UV lamp
Mummy’s chains are from £7 but she says you might already have one at home
In the kit you will get:
[above]
To make a cremains stone, be sure to wear gloves
Put a small amount of resin on a piece of label backing paper and put a little bit into the mould
Add a tiny bit of the sparkle mix but if you don’t like the colour you can use eyeshadow instead
Sprinkle on a tiny bit of ashes too and mix it together into a paste
Swirl a little bit of the sparkly ashes paste into the clear resin in the mould but don’t stir it too much
Cure it under your UV lamp for at least 60 seconds and let it cool down
Repeat this with some more clear resin and the paste and cure it again
Once it’s cured you can add some more paste in the next layer and just a tiny bit of clear resin this time
Mix them together really well and cure it, this layer should cover the stone in colour so you can’t see much light coming through anymore
Cure it and repeat until the mould is full and once it’s cured let it cool down totally before you take it out
If you’re enjoying my video please give it a like
And comment down below what colour Mummy should include in the DIY kits
When it’s nice and cold take the stone out of the mould
Check it and make sure you’re happy, you can remake it if you’re not sure
See if it fits in the pendant setting then sand down the edges a little bit if you need to
Put it in the setting and use the back of the teaspoon to press down the points
Add the chain and your necklace is finished
Make sure you don’t spray perfume on it and take it off before you have a bath or a shower
Now relax and do some crafting
Please note, this Easy Cremation Ashes Heart Tutorial contains affiliate links, meaning I receive a small income based on your purchases from Amazon and Etsy etc. This affiliate income is really helpful to me to support my family and if you’d like to know how I set it all up please get in touch (blogs coming soon!).
Nikki
pronouns – they/them
