Rabbit Fur Stone and Packaging Tutorial – making a ring with a rabbit’s fur and UV resin and packaging a Tree of Opals order. Keepsake jewellery using a mould to make a cabochon stone technique. In the video I’m showing you how to work with fur, and you’ll find more info in our Advanced Memorial Jewellery Course. Recently I’ve created two free courses to help people learn how to make breastmilk and memorial jewellery – click here to register and take them!
I’m using one of our solid silver rings which are great for rubbing over a stone or direct pouring; this is our Classic Oval Ring which is also available in gold filled here too. The ashes/hair/fur kit option for the ring comes with a single mould, so you can make a couple of cabochons then choose your favourite to set in the setting or you can pour the coloured paste and resin directly into the ring and top with hair then clear resin.
You can read about different types of silver here in Types of Silver and our classic rings are made from 940 purity Argentium silver, so a little purer and more tarnish-resistant than sterling silver.
Rabbit Fur Stone and Packaging Tutorial Video
After your first order you’ll receive a reasonable 15% off future purchases*. Firstly, when making memorial jewellery send your client a sending kit, see this blog How To Make Sending Kits for advice on instructing clients on sending in fur, here are the sending kit instructions templates and here are the clear sending pots we sell. This client returned their kit by Special Delivery and we ask them to give us the tracking number so I can look out for it.
You’ll need the following supplies
All of our rings are available as ashes and fur kits which contain everything but the UV lamp and scissors, but I’m listing the supplies I used below individually for professionals wanting to get the best possible results:
- Classic Oval Ring with ashes/fur kit
- Sending Kit and your client’s pet’s fur
- Gloves
- Dust mask
- Silver storage strips
- Silver polishing cloth
- label backing paper
- UV resin
- UV top coat
- 10x8mm clear silicone mould
- Resin Sparkle Mix or Pearlescent Powder
- Ultra Fine Sharpie
- White Tack
Tools and Equipment
- silica gel sachets
- tiny spoon
- SUN3 48w LED UV lamp to work with UV resin
- cocktail sticks
- tweezers
- hairdressing scissors
- You can also use epoxy resin for these pieces but you will need to wait for the resin to cure between layers which can take days
- side cutting pliers
- diamond file
- sandpaper
- ring clamp
- curved burnisher or a teaspoon
- silver polishing cloth

Rabbit Fur Stone and Packaging Tutorial
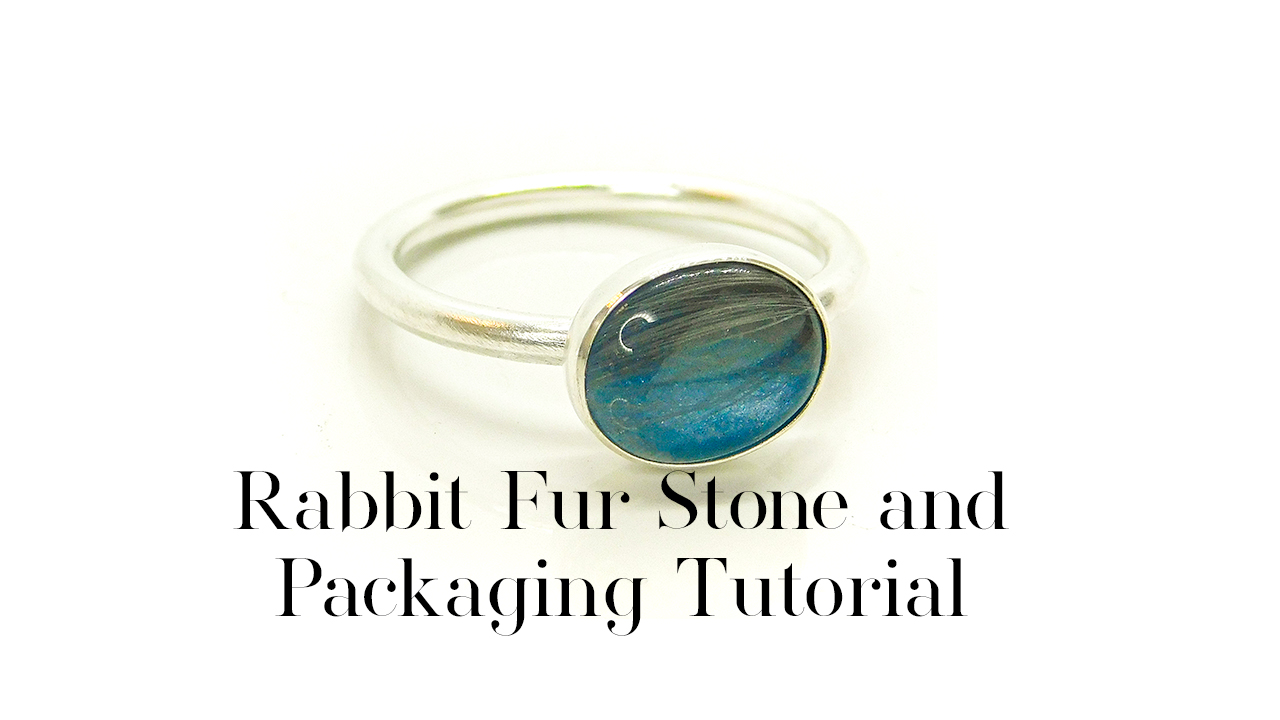
Hi, I’m Nikki Kamminga from Keepsaker Supplies and Tree of Opals and as part of my series on working with hair and fur, we’ll be making this classic silver ring with rabbit fur. This video is dedicated to Thumper, now laid to rest and over the rainbow bridge. I sent this client a kit for her rabbit’s fur and they posted it back to me by Special Delivery. See this blog How To Make Sending Kits for advice on instructing clients on sending in fur, here are the sending kit instructions templates and here are the clear sending pots we sell.
To make a rabbit fur stone, put a small amount of the fur on a piece of label backing paper. Don’t use it all up, no matter how much the client’s sent you… That’s very important in case you make a mistake! Today I’m going to make four stones, each with different amounts of fur or sparkle mixes, then send the client a “proof photo” so she can choose her favourite.
Add resin all along the fur then use a cocktail stick to soak the fur in the resin and remove air bubbles. I like to wait a little while with fur to allow the air bubbles to rise, then gently push them out. Fur can be very tricky to work with so if you’re new, practice with human hair a little first then make some fur practice pieces before you work on an order. You can request a sample of fur to practise with when you order from KeepsakerSupplies.com by ordering a “dried leaf” and requesting fur, ashes or breastmilk in the comments.
Cut the fur to lengths a little longer than the mould, so they can curve around. Using tweezers, carefully transfer the fur to the moulds. This bit needs lots of patience, and the less you “mess with” the fur, the fewer air bubbles will be introduced. Check from the back and you can see where any bubbles are hiding and nudge them back out. Once you’re happy with the fur placement, cure for 99 seconds on a low heat setting, I use a SUN3 UV lamp.
Once they’re cured, add a little clear resin to the mould so that the whole of the top layer is coated, but not too much or you won’t have room to add colour. I don’t recommend doing hair and fur pieces without colour, because you’ll see the base of the ring underneath it and dirt can get trapped under there, it doesn’t look very nice. Next, put some clear resin on a piece of label backing paper and add the pigments you want. I’ve used Aegean Blue Resin Sparkle Mix and Pearly Blue Resin Sparkle Mix in various combinations here. Mix the pigment into the resin to create a paste. Add another very thin layer of clear resin to the mould and swirl in the tiniest bit of pigmented paste, now cure again. Repeat, using slightly more pigment in each layer until it’s full. Don’t use too much pigment or you’ll find the layer won’t cure properly.
I also like to cure the offcuts of fur and return these to the client. I find that UV resin gives me more options when it comes to creating depth and artistic flair than epoxy resin. The amount of layers depends on the depth of the mould and the thickness of the layers but at this point my mould was full. After the final layer, add some top coat to the back of all the stones, cure and cool. Wait until the stones are completely cool then remove them from the mould and give them a good check. Number the stones on the back and put them on something you can photograph for your client. Send your client a proof photo to see which one they prefer. I do edit the photos a little to get the best view of the stones, so they’re more true to life. Play around with the settings on your photo, I’ve put the exact settings I used here
iPhone Photo Settings
Shadows: -14
Contrast:+14
Brightness:-15
Black Point: +10
Saturation: +4
Vibrancy: -5
Sharpness: +18
Definition: +7
I have a little message template stored in the notes on my phone which I can copy and paste into an email or social media message to the client, adjusting a little for each order. Comment on the video or this blog if you’d like to know the wording of the email! Always let your clients know that the spare stones will be returned to them, along with the leftover fur, free of charge. My client chose stone number one, so I place the rest of the stones in a small cellophane bag to return to her. Take their chosen stone and trim the edges with scissors, tin snips or side cutting pliers. Check it in the ring setting and, if necessary, use some coarse sandpaper to level out the back. If the stone is too tall, sand it down until it sits nicely, if it’s too short then build up the back with some UV resin. This stone was a little dull so I added a layer of top coat.
Once it’s completely cured and cooled, cure it again and allow to cool before setting it or you can make the top coat dull. Next, put the ring in a ring clamp then add the fur stone. You don’t need glue
Use a curved burnisher to press in the edges at 12o’clock, 6o’clock, 3o’clock then 9o’clock, then the corners, then smooth down any ridges. Give it a final polish with a silver polishing cloth and photograph.
Rabbit Fur Stone and Packaging Tutorial
Here’s how I package my Tree of Opals orders. I add a piece of folded tissue paper to the box, then some shredded paper (also recycled). Then add the ring in the jewellery box along with a silica gel sachet, or a silver storage strip. Add their kit with the remaining fur and the spare stones. I like to include a couple of pieces of dried lavender because it makes the box smell beautiful. Then I add a business card and a wish bracelet… thank you to my friend’s daughter for helping me make this batch. I get so many lovely comments on the wish bracelets including from this client – let me know if you’d like a tutorial!
An existing customer discount code for their next order and a branded jewellery polishing cloth.
Finally they get a printout of my care instructions. Also I print out the invoice and write each client a little personalised note. Sometimes I add a certificate of authenticity if the client requests one, but in the case of this ring it’s very obvious from the beautiful grey colour of the rabbit’s fur that I’ve used the fur sent. Fold over the tissue paper and use a thank you sticker to seal, then close the box and add eco friendly packaging tape and a shipping label.
I’m so grateful for my client’s permission to film this as part of my Advanced Memorial Jewellery Course and for their trust in working with Thumper’s fur, and I look forward to showing you more fur tutorials soon. Now relax and do some crafting
Please note, this Rabbit Fur Stone and Packaging Tutorial contains affiliate links, meaning I receive a small income based on your purchases from Amazon and Etsy etc. This affiliate income is really helpful to me to support my family and if you’d like to know how I set it all up please get in touch (blogs coming soon!).
Nikki
pronouns – they/them
