Filled Marquise Ashes Ring with Bonus Dangle Charm – making memorial jewellery using a direct pour technique. This technique is ideal for our exclusive hybrid rings here which are great for direct pouring because the walls are curved over, meaning the resin can’t pop out again. You also have the option to use the mould included in the kit to make a couple of cabochons then choose your favourite to glue into the setting and top coat.
Filled Marquise Ashes Ring with Bonus Dangle Charm Video
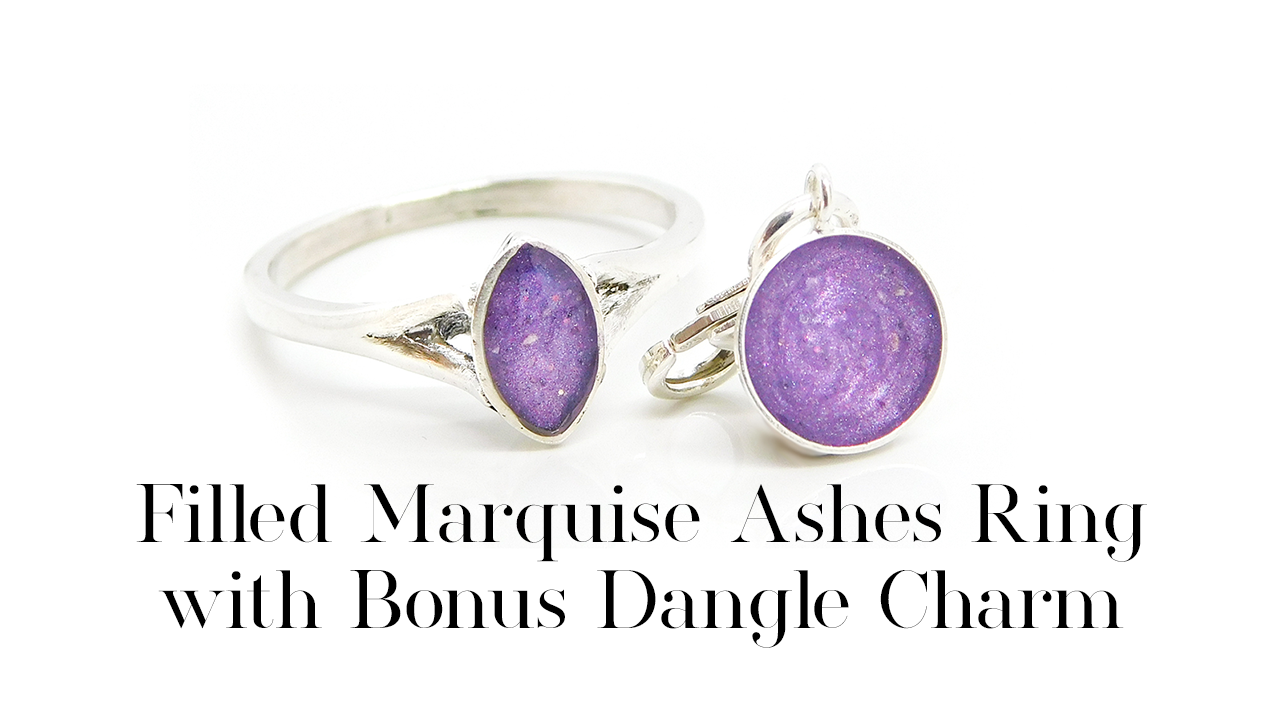
Filled Marquise Ashes Ring with Bonus Dangle Charm
You’ll need the following supplies
one of our DIY ashes ring kits
the ashes/hair version of the kits contain:
- a single silicone mould, although we’re not using it in this video
- a ring setting – this is one of our exclusive Hannah solitaire rings
- vinyl gloves
- resin sparkle mix (you can use eyeshadow for a custom colour!)
- a dust mask
- label backing paper
- some sandpaper
- 3 cocktail sticks
- 10g UV resin
You’ll also need your client’s cremation ashes for this Filled Marquise Ashes Ring Tutorial. We ask them to only send half a teaspoonful! That way, if it’s lost in the post they can send a little more.
- LED UV lamp**
- UV top coat (which today I used in place of resin)
- a pestle and mortar
- a tiny measuring spoon
- and a ring clamp
- bezel cup setting
- jump ring
- lobster clasp
- pliers
SENDING ASHES
You can see that I’ve asked my client to only send half a teaspoonful of ashes here and you’ll quickly see why
It breaks my heart when I see artists receiving large bags full of cremation ashes because they so often go missing in the post and you need so little to create such a stunning effect
This ring is a replacement for my client because the first one I sent was lost by the courier
I’m not going to name and shame, and my client was so kind and understanding
So I offered to remake the ring and cover the shipping to her out of my own pocket
I’m so glad she hadn’t sent more ashes in the first place because, although ashes are irreplaceable, it’s better to lose half a teaspoonful than a cupful
If I’m working with a small pet or a baby’s ashes I’ll ask the family to send a large pinch of cremation ashes instead because we can always ask for them to send more if needed
Please make sure you wear a respirator when grinding ashes!

FILLING THE RING
Put a small drop of resin on a piece of label backing paper; you can use epoxy or UV but here I’m using a UV top coat because it’s super hard
Add a tiny bit of ashes and some resin sparkle mix, stir it thoroughly
Make sure you’re wearing PPE, although, I’m not wearing gloves because this is very fiddly and they get in the way but I do usually
Put your ring in the side of the ring clamp
Use a cocktail stick to transfer a very thin layer to the ring. If you’re working in UV resin it has to be this thin or it won’t cure because the light can’t penetrate the top layer.
If you’re working in epoxy resin you might want to do the first layer in colour then add the ashes to the second layer on top, otherwise the ashes could sink and you won’t see them
Cure the ring in the UV lamp for 60 seconds
Because the piece is so small, there’s no risk of it overheating so you don’t have to have a low heat setting
Do another layer and if you add too much resin, twist the side of the cocktail stick over it to lift the excess away and cure again,
The colour should come around two thirds of the way up the sides or just under the edge
The resin will seep up the sides a little and be concave or domed in
You don’t need to worry about the stone popping out with the Hannah ring because the sides curve over

FILLING A BEZEL CUP
I fill this shallow cup exactly the same as the ring, in very thin layers
You can create dozens of pieces for a family at the same time and switching from piece to piece allows them to cool down completely in between using this Filled Marquise Ashes Ring Tutorial
TOP COAT
Whilst the bezel cup is under the UV lamp, you can do a top coat on the ring
Be a bit careful here and take time to make sure it doesn’t bleed over the edge and has a slight dome
Cure it making totally sure it’s completely level
Whilst it’s curing do another coat of colour in the bezel cup
I like to make a swirl, starting from the edge and working in, immediately before putting it in the lamp to cure
If you’re working with epoxy then pour your resin and come back to swirl it once it’s thickened a bit to the texture of Marmite
When it’s cured and cooled, add a top coat
ADDING A LOBSTER CLASP
Use a jump ring opener to add the findings to your jewellery
In this case I’m adding a lobster clasp so my client can wear it on a large link bracelet or necklace, or remove it to wear on a chain
I’m so happy with how this order turned out and I want you all to try these techniques out
If you’re a keepsake and memorial jeweller, do you prefer using a mould or doing direct pours?
Let me know in the comments below
This video is dedicated to Michael who passed away in January at the age of 31 due to complications with Covid and an unknown heart condition.
I really hope that this ring and little dangle charm help his family keep a part of him close at all times

**Which UV Lamp To Use
I’m using a 48w Sun3 lamp with a low heat setting but any UV lamp or torch will do when making breastmilk jewellery. We sell a USB powered mini lamp here (UK only, sorry – here’s the USA version). We don’t recommend you use daylight unless it’s very bright and sunny and you work in extremely thin layers. We had a client contact us recently and we’re replacing their DIY ring after the resin exploded out of the centre after being cured on the windowsill. The sunlight had only cured the very top layer, underneath was still liquid.
If you add too much pigment to a piece too it won’t cure, I’ve had beads that you can crush in your fingertips made by new artists that added too much resin sparkle mix.
Adding Hair
If you want to add hair when following this Filled Marquise Ashes Ring Tutorial then you can cut a little and add it along with, or instead of, the ashes. I find it a lot easier to shape it into a mould though.
There’s a tutorial linked here teaching you how to do that and set it in a rubover setting
This is one of our exclusive hybrid settings meaning you can pour directly into it like I’m doing here or you can glue in a cabochon then dome it with a top coat to add extra security
Now relax and do some crafting!
Please note, this Filled Marquise Ashes Ring Tutorial with Bonus Dangle Charm contains affiliate links, meaning I receive a small income based on your purchases from Amazon and Etsy etc. This affiliate income is really helpful to me to support my family and if you’d like to know how I set it all up please get in touch (blogs coming soon!).
Nikki
pronouns – they/them
*terms apply – some products aren’t included such as settings and findings, sorry.
