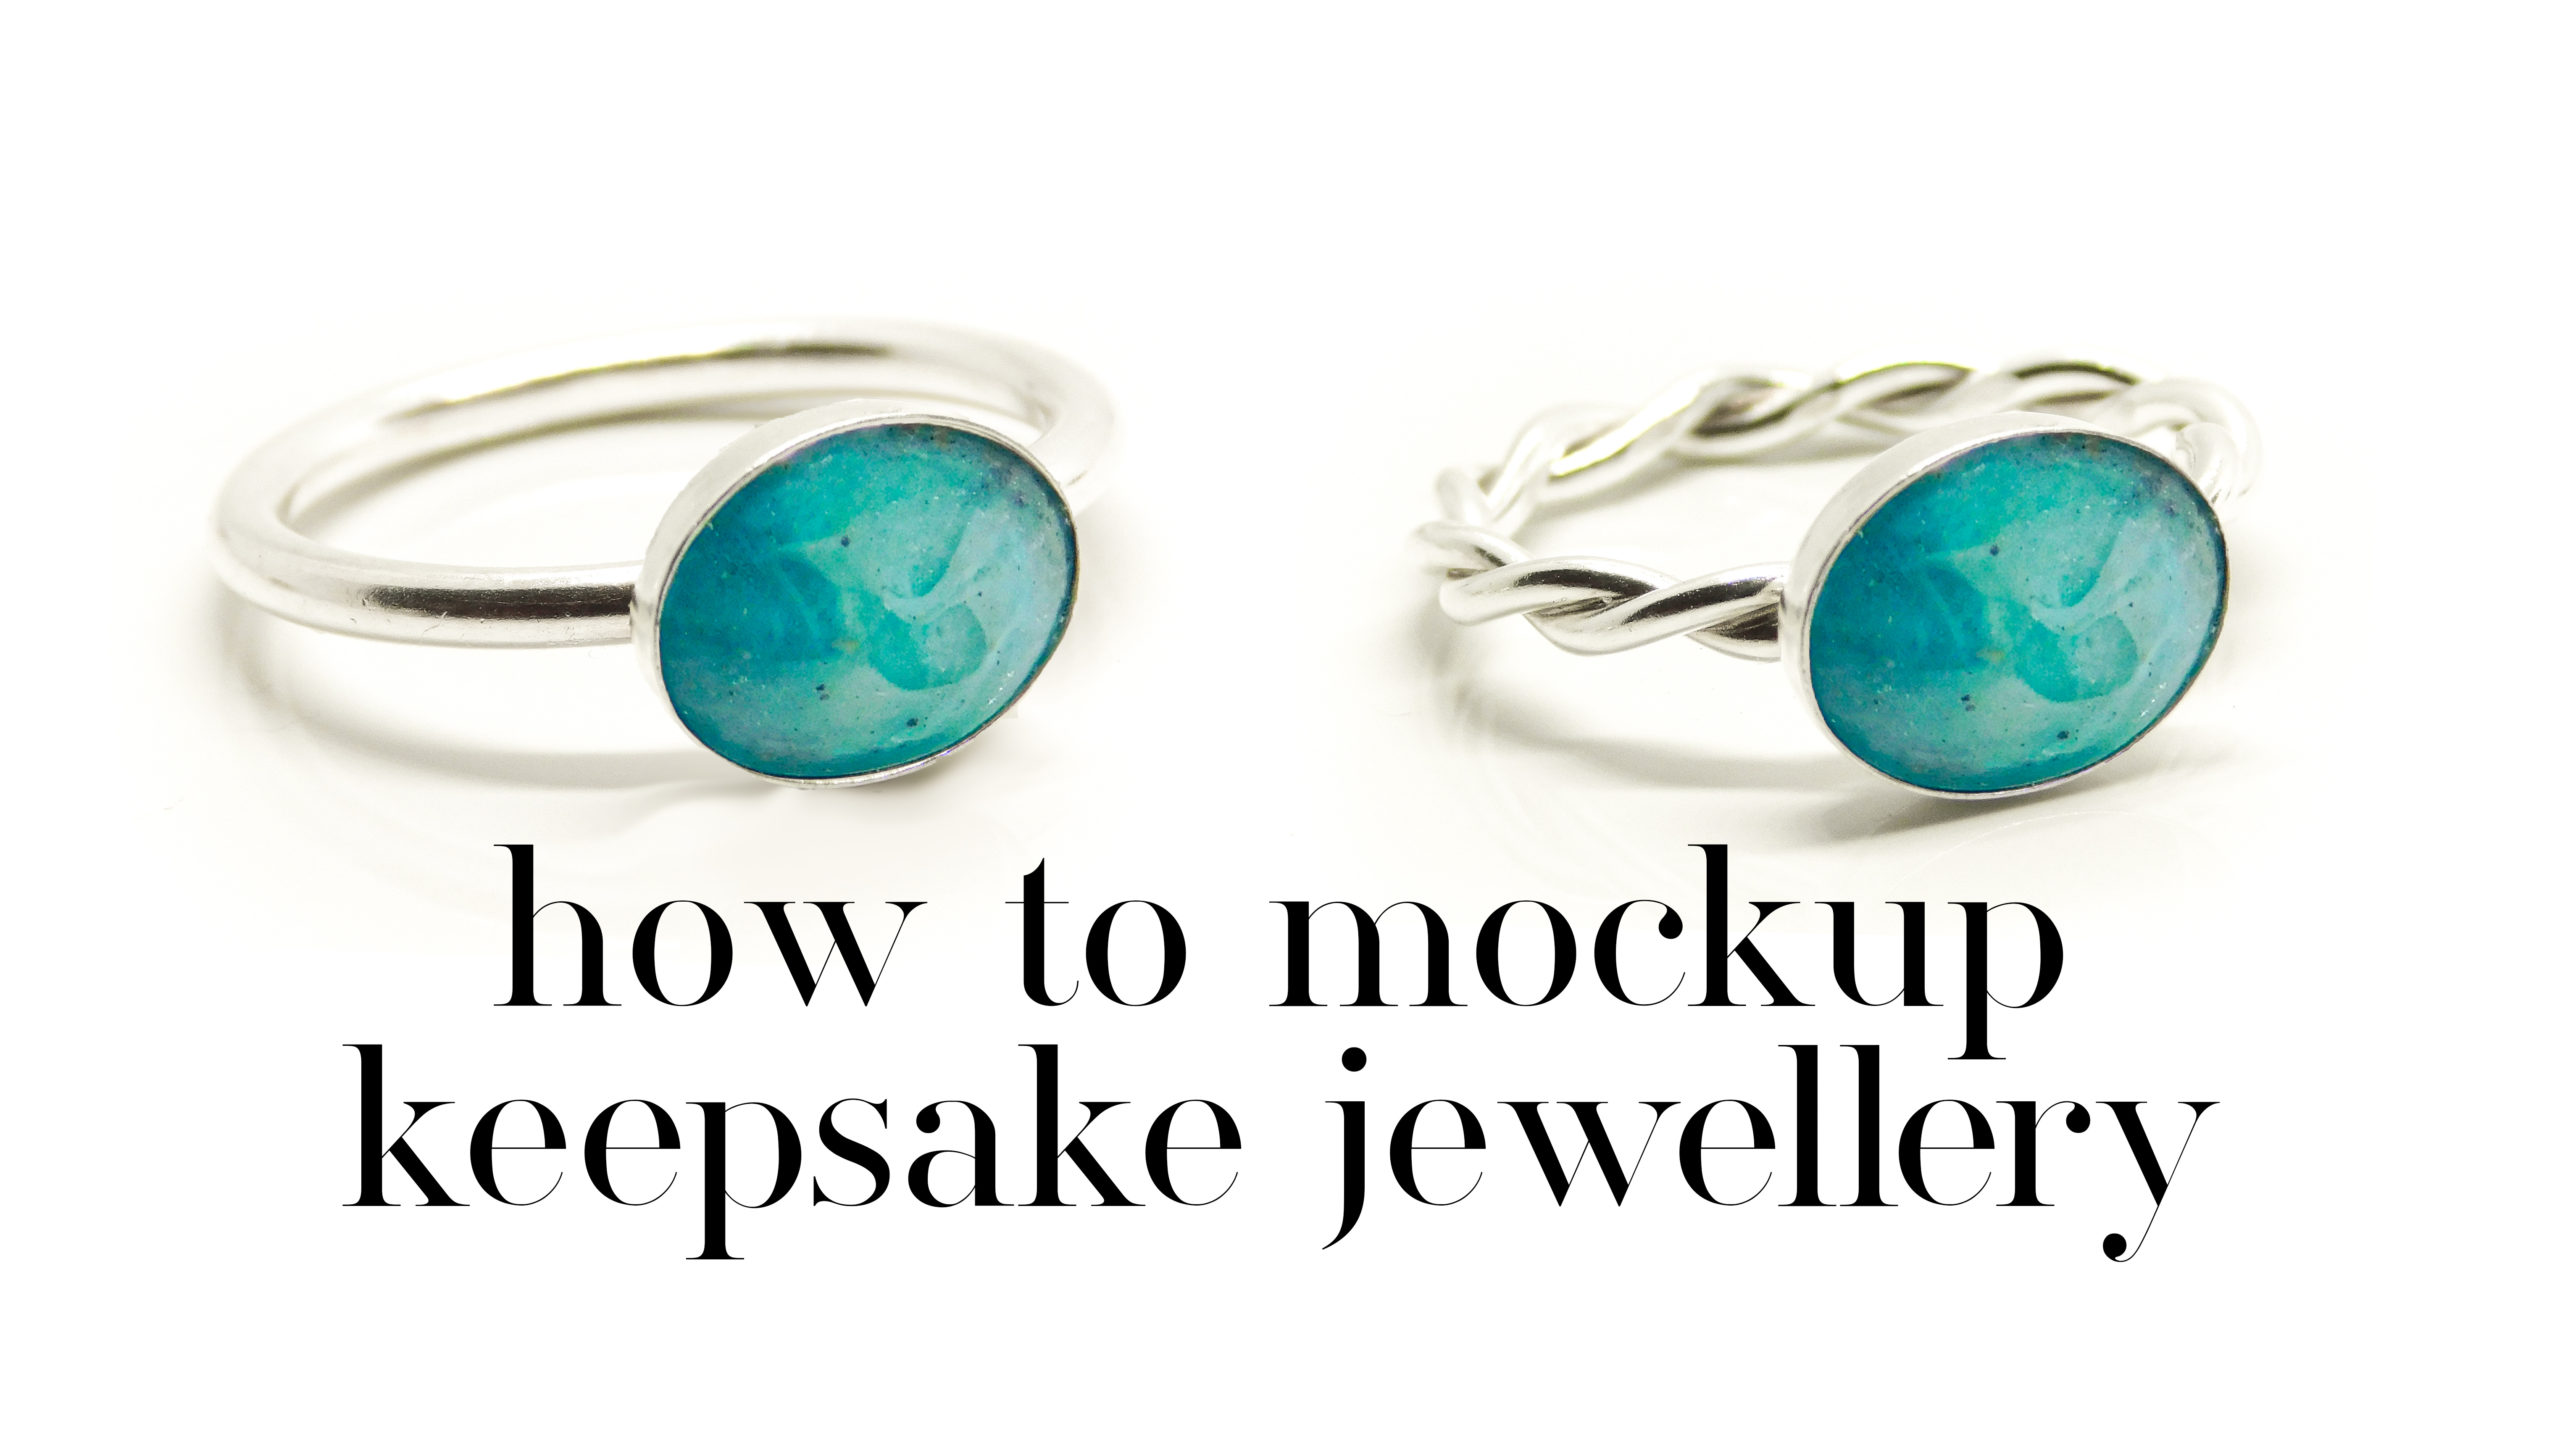
How To Mockup Keepsake Jewellery – Adobe Photoshop for making keepsake jewellery to market and sell online and in person. Easy and slow tutorial for moving a stone from one piece to another, with a ring for the example. You can use this tutorial for any keepsake, memorial or breastmilk ring or necklace or even to replace the a bead core in a European bead. These rings are the Classic Ring and the Twisted Ring, both with the 10x8mm oval bezel cup, made with a 10x8mm mould, cremation ashes and alcohol inks. There’s an alcohol ink video coming soon.
I use Adobe Lightroom to import my raw photos from the camera memory card and to store and organise them on my laptop. I can easily remove the photos I don’t want, add meta data and make basic adjustments. It’s simple to open an image in Photoshop from Lightroom, so if there are two I want to edit I open them both in Photoshop, do what I need and save, then the changes are there in Lightroom for me. I like this blog from Hubspot because it has lots of PS keyboard shortcuts and I’m always learning something new.
How To Mockup Keepsake Jewellery Tutorial Video


I was lucky with this one because it was pretty much the right size already, because the rings were about the same size in each photo. It’s easy to change the size if your stone is too big or small.
How to Mockup Keepsake Jewellery – Easy Photoshop Tutorial
Hi, I’m Nikki Kamminga from Keepsaker Supplies and Tree of Opals and today we’re going to mockup a twisted band ring with blue lagoon effect stone using Adobe Photoshop. You can learn to “move” a stone from one ring to another. I use Lightroom, also by Adobe, because I process a large volume of images and it makes it much easier to add the metadata like the photo title and description.
I had photographed a ring I had made for a client with a 10x8mm oval cabochon in a rubover bezel setting. It had a classic band, which is my 2mm plain round ring shank. I wanted to be able to show a few different stone types in a twisted band setting too so I photographed a setting without a cabochon stone. I wanted to Photoshop the stone from the classic band over to the twisted band.
How To Edit The Photos
Open up your two photos in Photoshop. If you’re already in Lightroom hold control and E [ctrl+E] and choose the first option, “Edit a copy with Lightroom adjustments” (I just hit enter) and repeat for the other photo.
Go to the ring with the stone and choose the “Quick Selection tool”, which is a paintbrush painting a dotted line, or just press the letter W to get the tool. Make sure it’s on “Add to selection” then come down to the stone and click in the centre of the stone. You can change the settings of the tool but I find if there’s good contrast, it automatically selects the stone perfectly. There might be more accurate ways of doing this, perhaps with the “Color Range” selection tool, or using the curvature pen tool (P), but this method is fast and easy and always works well for me!
Press control and J to duplicate this layer. If you click on “Layers” you’ll see the stone is on a separate layer to the ring. Select the “Move” tool, you can just type V to do that faster. Drag the stone up to the tab where you have the other ring, which can be a blank ring you’ve bought like this one from me, or a finished ring with a stone in it already like a lock of hair. Drag it to roughly where you want it to be on the new ring and let go.
Next, you need to lower the opacity of the stone so you can place it perfectly. Go to Layers here on the right, make sure it’s on Layer 1 which should be the stone, then change the Opacity to about 70%. Zoom in a bit, I do ctrl+ to zoom in but you can also hit Z and click where you want to zoom in. Now move the stone around so it’s pretty much perfectly in the centre. Click on the corners of the box to warp the stone, click on this curved box at the top, marked “Switch between free transform and warp modes”. Now you can drag different areas of the stone out to warp it to perfectly fit the bezel cup. You can check back to the original image to see how it sits within the setting.
The benefit of using Photoshop is that it can be a lot faster to get lots of images to use on social media and your website without having to take too many photos. Your client might want to see what one looks like before they’re willing to buy. I am busy designing a mockup creator for my ring, necklace and bead settings where you can add your own designs, look out for another video on that soon.
When you’re done warping, click the tick to “Commit transform”, then go back to Layers. Change the opacity of Layer 1 back to 100% and you’re done. Control and S (Ctrl+S) to save and your mockup is finished. You can close the file and also the original image (no need to save changes to that one). You can go back to Lightroom and in the Library edit the title and description of the new image before exporting with your watermark.
This video isn’t sponsored but if you find it helpful please let me know in the comments! If you’d like to know about the camera I use, the tripod and lightbox or how I edit photos in Lightroom and Photoshop drop a comment down below. Would you like to find out how to get the perfectly white background with a natural shadow underneath?
Now relax and do some crafting!
Both of these rings are made from solid Argentium silver which is 935 or 940 purity, that’s a little purer than sterling silver which is 925 quality. It contains less copper and is less prone to tarnishing than sterling, but you can still advertise it as sterling if you’re more comfortable with that. If a client asks, “is it real sterling silver” you can either say yes, or let them know it’s slightly better quality and a little less likely to change colour. Some clients are more prone to tarnishing than others anyway due to their biology and there are also atmospheric conditions and things like hand sanitiser which make it more likely. Argentium silver isn’t tarnish-proof but to me it always looks a little brighter and I love working with it.
Please note, this How To Mockup Keepsake Jewellery Tutorial blog contains affiliate links, meaning I receive a small income based on your purchases from Amazon and Etsy etc. This affiliate income is really helpful to me to support my family and if you’d like to know how I set it all up please see my affiliate page here.
Nikki
pronouns – they/them


This tutorial is incredibly helpful and well-explained! As someone who’s interested in keepsake jewellery, I’ve often wondered how to create mockups for showcasing different designs. This step-by-step guide using Adobe Photoshop makes the process seem much more manageable. Thank you for sharing such a valuable resource!