How To Photograph Keepsake Jewellery, how we produce our product photos and stock images to a high quality without misleading editing. It has never been much of a secret but here I’m going to share some of the tricks and tips to achieving high quality, ethically edited product photography.
Ethically Edited Photos
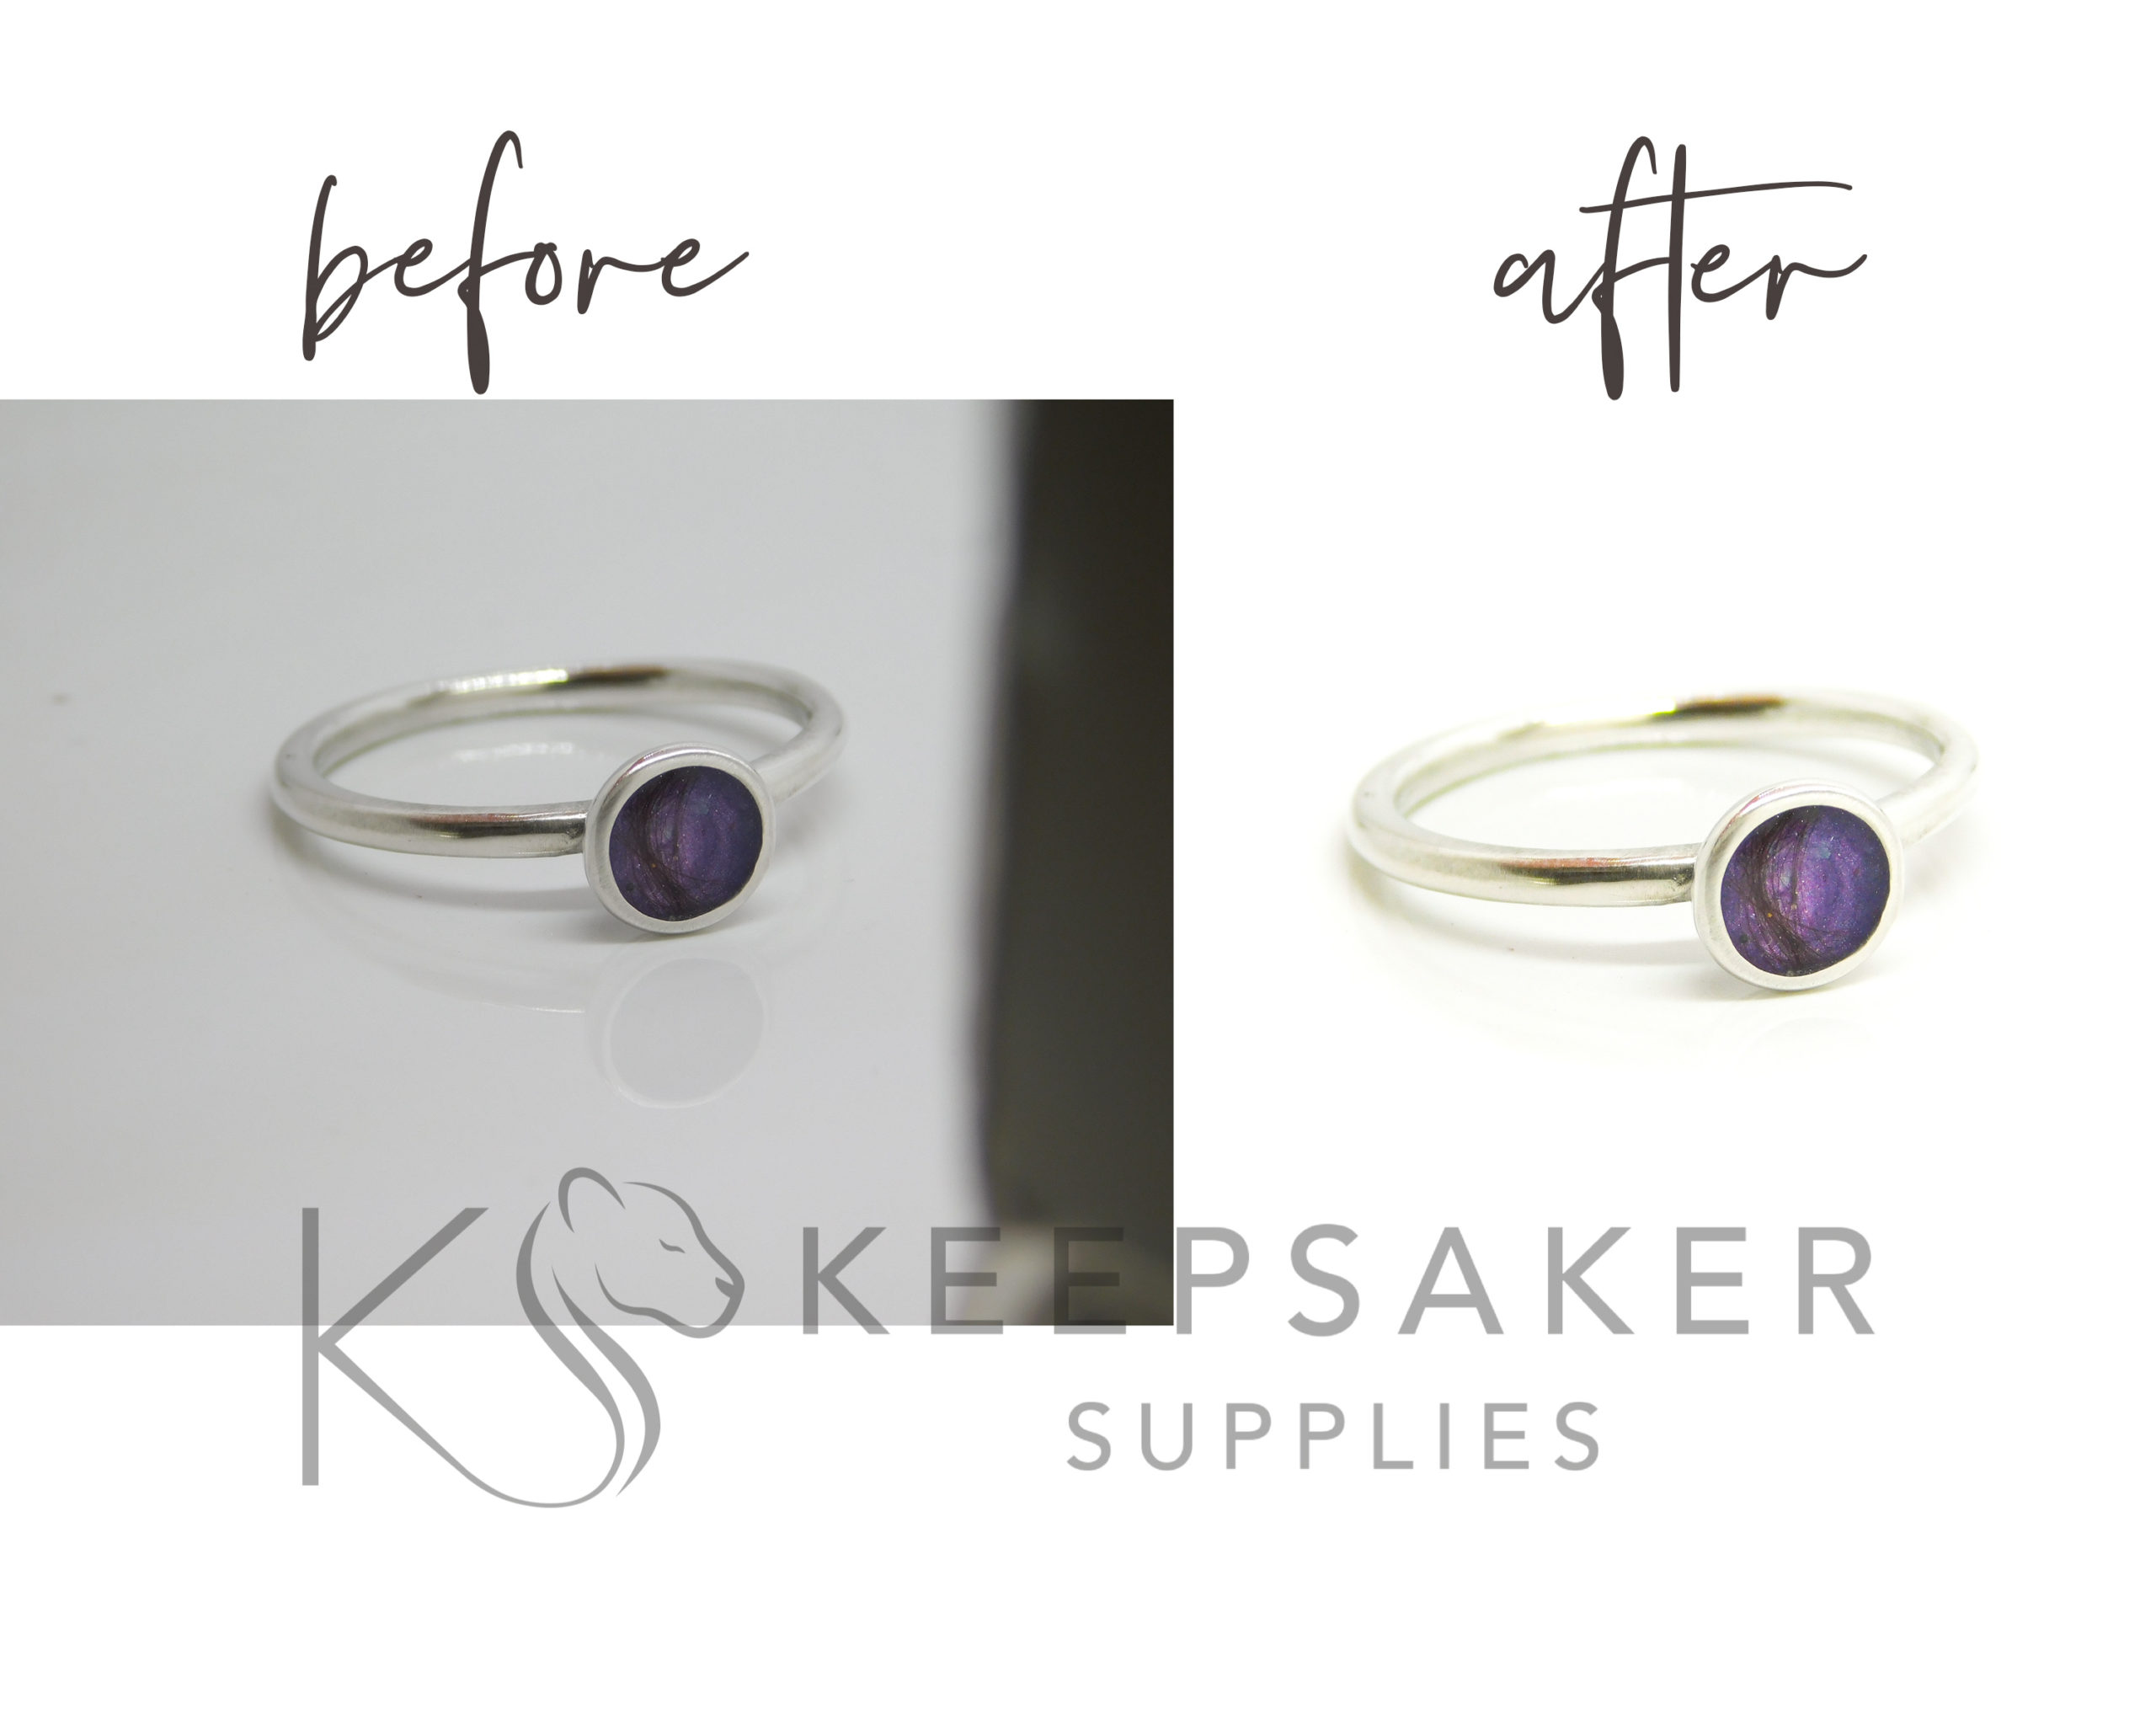
What does ethically edited mean? We’re not rubbing out any of the flaws in our pieces, we aren’t removing any specks of dust in our resin or scratches in the metal work. We turn raw images into beautiful product photos with the use of Lightroom and Photoshop to get the quality you see here.
Taking the photos
Using a good quality lightbox like our one here, or a simple box if you have reliable natural daylight. You can take the photos with a smartphone, digital camera or with a DSLR. I’d advise against buying a really expensive digital camera straight away, because it’s the lens that’s important and you can purchase clip on lenses for a smartphone like these. If you are on a really tight budget, then you can use most smart phones, if you zoom in (usually by pinching the screen on your phone) and hold the phone a little further away then it will focus much better!

I got my own DSLR (digital single-lens reflex camera) on Facebook selling pages but we’d recommend this is the Nikon Coolpix B500 which I use. I like to add a point or two to the exposure and play round with the settings so it’s in macro mode and focuses where I tell it to on the image. It’s taken years of practice but in the first few months I took photos I was so happy with and haven’t changed the way much since.
You should take a few photos and check to see if there’s anything wrong. Here my fingers were in the photo creating a two shadows, and the shadow at the front is the cardboard I bounce the light back with.

Import Into Lightroom
I like to use Lightroom because it’s always been familiar to me and I pay for a photography bundle. I open Lightroom and plug the camera into the laptop. When I import them, a virtual copy shows in Lightroom, and changes made to them aren’t actually made to the photos until they’re exported. So I make the adjustments until I’m happy then export them to Creative Cloud, I can access my photos from the desktop at work or the laptop at home. Import all the photos.

Edit In Photoshop
I open the photo in Photoshop then the first thing I do is cropping the image to square. I like having all of my photos square so they are nice and uniform. Thisway, part of it has a perfectly white background too. I remove any marks on the background, any WhiteTack if I’ve propped the item up etc. Then I save and close the photo in Photoshop, go back over to Lightroom and now I have an edited copy. I can delete the original or mark it as Rejected and delete all the rejected ones together later.

Back In Lightroom
The next adjustments are brightness, white balance, exposure, colour correction and clarity etc. I like to make the photos a bit sharper to highlight the uniqueness of each piece. The adjustments in this one were temp +3, tint -7, exposure +0.49, whites +73, texture +19, vibrance +17, saturation +12, purple saturation +15, sharpening 27.


Perfect the White Background
I like the photos to be nice and uniform so I make the background perfectly white while keeping the reflections and shadows of the jewellery. I use the adjustment brush to remove the last of the grey from the background and slightly lighten the purple, so it looks more like it did in sunlight. This is the photo I’ll export to my website and in the process I add the title, copyright status, ownership and tags, with my watermark set as a transparency


As you can see, the ring certainly isn’t “perfect” but I have no interest in removing imperfections. It’s great that you can see it’s handmade and this ring was extremely difficult to make as I only had 10 strands of hair from a baby who had passed away. You can read the blog and see the video here – Direct Pour Hair Ring With Tiny Lock of Baby Hair.
This blog may contain affiliate links meaning we earn a small extra income from any purchases you make at no extra cost to you.

[…] Product Photography Gear […]