This video will show you how to make this resin cremation ashes ring from start to finish using UV resin like ours here and one of our custom ring settings. I’m working with human ashes in this video so if you find this upsetting please do not watch. The resin part of this is very similar to our How to Make a Cremation Ashes Heart Necklace blog, but this setting will take a little more practice
You can read more about working with ashes in our How To Make Cremation Ashes Jewellery blog here (click).
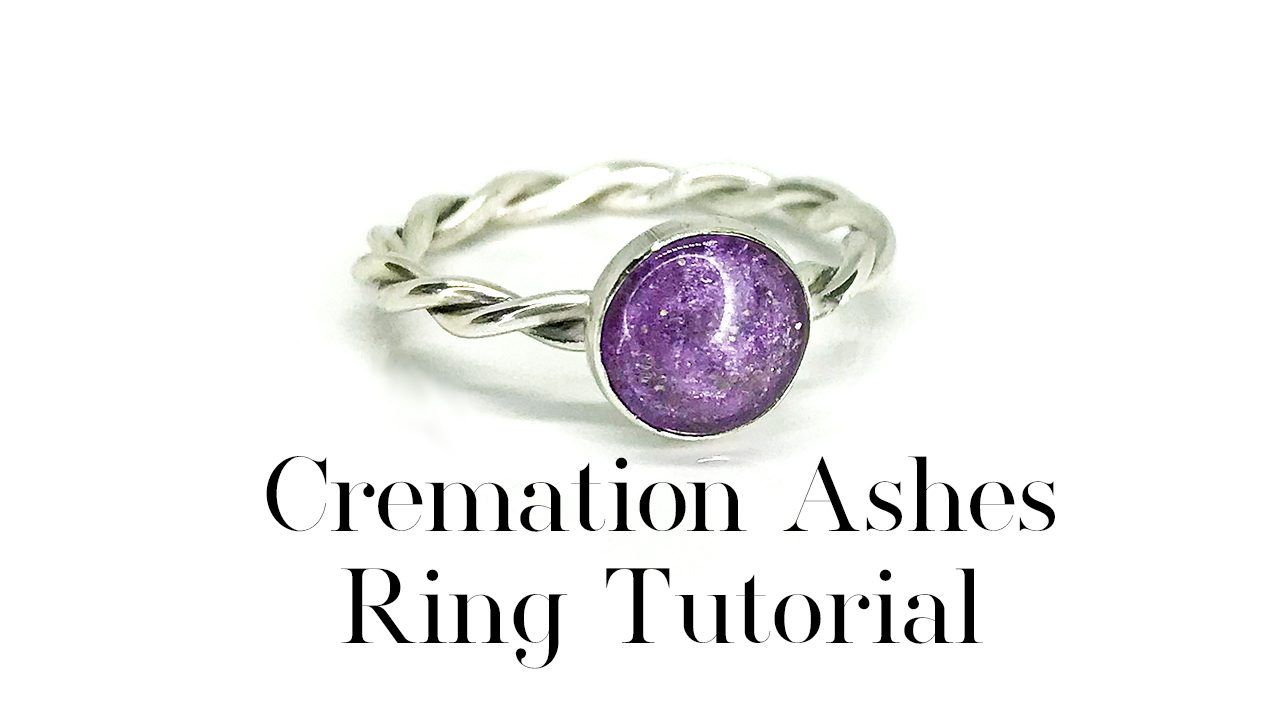
How To Make A Cremation Ashes Ring
You’ll need the following supplies:
a heavy duty safety mask or nail tech masks
vinyl gloves
one of our ring settings in your client’s size
our 8mm cabochon duo mould (or the our 8mm the faceted version)
rubbing alcohol or gel nail cleanser solution
a rag
cremation ashes (you can request some horse ashes here to practice with)
cremation ashes spoon
small pestle and mortar (coming soon)
UV resin
cocktail stick
your client’s choice in colour of resin sparkle mix
you’ll also need:
a ring sizing mandrel
silver polishing cloth (coming soon)
a ring clamp (cruelty-free ones coming soon)
a diamond file (coming soon)
a burnishing tool (coming soon)
I like to use an LED UV lamp to save energy and make sure the pieces don’t get too hot. This one has a 99 second low heat setting
Please note we have specific supplies lists for the UK, USA, Australia (Canada coming very soon). We will soon be adding the option to order each of our ring and necklace settings as a DIY kit. Some of the supplies are optional, such as the pestle and mortar, ring clamp and the polishing cloth.
PREPARING THE MOULD
Firstly, inspect your mould and check for any dust or dirt, or lines and imperfections
You could make this ring without a mould, but I’ll cover the reasons why we don’t recommend this in another video
Prepare the mould if it’s a little dusty by one of two methods
- The first is by wiping it with rubbing alcohol or nail cleanser solution with a rag
- The second is by applying a thin layer of UV resin, then curing. The dust will come off when you remove the resin
It’s always better to replace a mould when it’s starting to get dull than spend hours trying to get a perfect shine back on your finished piece
CURE FOR 99 SECONDS
Then, you can remove the cleaning layer
Clear Layer
Carefully put a very small dot of resin in the centre of each of the mould depressions
Gently use a cocktail stick to move the resin to the edges and remove any bubbles
Be careful not to poke your mould at this stage
Place it under your UV lamp for 30 seconds
This will give you a clear top layer on your finished piece, make sure you work in very thin layers
ADDING CREMATION ASHES
Check you have the right colours and double check your client’s name and order number against what they’ve ordered
You can take a tiny spoonful of ashes and grind them a little finer
Put them to one side, where you can’t knock them over
Pour another layer of resin in, about half of the way up
Dip a cocktail stick in the resin, then in the colour (today I’m using the orchid purple resin sparkle mix again)
This will pick up a tiny bit of the colour which you then place in the resin in a controlled way
Then dip the same end in the finely ground ashes, and place that in the resin too
Gently swirl everything around to cover the first layer
If you want lots of depth to your piece, then don’t add too much of anything in the first colour layer
Keep it nice and translucent
cure for 30 seconds
Second Colour Layer
Repeat with another thin layer of resin and use the other end of the cocktail stick to avoid dipping ashes in your colour
Keep this second colour layer fairly translucent too
Cure for another 30 seconds
Third Colour Layer
Repeat with another thin layer of resin, and use a new cocktail stick
This layer can be fairly opaque, but if you add too much colour it won’t cure!
Cure for another 30 second
Finally add a thin layer of clear resin to bring it level with the side of the mould
Cure for 99 seconds
Remove from the UV lamp and leave to cool
Remove the cabochons from the mould, trying not to touch the shiny top
Cure for a final 99 seconds and leave to completely cool
A way to help them cool quickly is by placing them on a cold tile
You can send your client a photo of the cabochons to make sure they’re happy with the colour and choose their favourite stone
Clear up
Use the cooling time to clear up your workstation, put your client’s ashes back into their bag and wash your pestle and mortar
SETTING
Preparing the cabochon
Double check the cabochon for imperfections
You might need to remove a little excess resin with a flat diamond file
Don’t forget to wear a mask doing this
Then wipe it with rubbing alcohol to remove any dust and stickiness
Preparing The Setting
Use a ring sizing mandrel to check that your ring setting is the correct size
If you like, give it all a quick polish with a silver polishing cloth
Clamp it in a ring mandrel if you have one
Place the stone inside and check it sits nicely
Setting the stone
Use a curved burnishing tool to very gently push down the silver around the edges
Work around as if it’s a clock, 12 o’clock, 6 o’clock, 3 o’clock, 9 o’clock
Don’t push too hard or you could end up with ridges in the silver
Once it’s all pushed down you can start to apply a little force
Make a tight seal by rubbing the silver over. That’s why it’s called a rubover setting
Let me know in the comments if you’d like to see more videos like this and don’t forget I’ve linked to the blog and all the supplies you need down below
Now relax and do some crafting

**contains sponsored content meaning I may receive a small income based on purchases you make on my recommendations. Some of the products mentioned and linked to are ones my own items for sale

[…] so if you find this upsetting please do not watch. The resin part of this is very similar to our How to Make a Cremation Ashes Ring blog, but this setting is much […]
[…] How To Make A Cremation Ashes Ring […]
I just come accross this site, this is something that I’ve been looking for and will be doing for sure, I LOVE this and the ideal… for me i would like to see more videos or ideals you have.. THIS IS GREAT… THANK YOU SO MUCH
Aww thank you Sharon – I’ve just had a new baby so I’m just doing videos now and again when she’s asleep. Have you subscribed to my YouTube channel here?
Thanks
Nikki