Slow Speed Ring Turner Tutorial – making bereavement and cremation jewellery using a slow speed ring turner with a direct pour technique. This ring turner is like a slow lathe for filling and getting a perfect result on channel rings. It’s great for UV and epoxy resin and CA glue. This technique is ideal for our channel rings here which are anti-tarnish solid silver. You don’t need a lathe for this tutorial but if you have one, definitely use it for the sanding process. You can see our basic channel ring tutorial here and the advanced channel ring tutorial here.
Slow Speed Ring Turner Tutorial Video
TikTok coming soon
Here’s the transcript. After your first order you’ll receive a reasonable 15% off future purchases. We have several courses here including some free to help you learn more about making bereavement and cremation jewelry such as a cremation ring.
You’ll need the following supplies
slow speed ring turner or SSRT
one of our DIY ashes ring kits
the ashes/hair version of the kits contain:
- a ring setting – this is one of our full channel rings
- a practice setting for direct pour (checking colour etc)
- vinyl gloves
- resin sparkle mix (you can use eyeshadow for a custom colour!)
- a dust mask
- label backing paper
- some sandpaper
- 3 cocktail sticks
- 10g UV resin
You’ll also need your client’s cremation ashes for this Slow Speed Ring Turner Tutorial. We ask them to only send half a teaspoonful! That way, if it’s lost in the post they can send a little more. You may also need:
-
- white electrical tape
- LED UV pen light** or a good 48w UV lamp for professionals
- tiny spoon
- a pestle and mortar (optional)
- Ultra Fine Sharpie (optional)
- 200g bottle of Padico Star Drop
- sparkle applicator or brush (optional)
- craft knife (optional)
- clear ruler (optional)
- scissors
- silicone stirrer (optional)
- magic silver polishing stick (optional)
- USB drill (optional)
- sanding bits (optional)
- silicone ring stick here (optional)
- a drill like this (optional)
- ultra fine foam sanding pads (optional)
- diamond polishing pastes (optional)
- Padico Star Drop Gloss UV Top Coat (optional)


Slow Speed Ring Turner Tutorial
For a channel bead we’d recommend using a rotary tool or a drill but we are hoping to have bead compatible mandrels soon!
Slow Speed Ring Turner Tutorial
Hi, I’m Nikki Lovegrove I’m super excited to show you the new slow speed ring turner or SSRT that I’m stocking on my website KeepsakerSupplies.com This video is dedicated to my clients’ mum, Tracey Hingston who passed away last August. This is Tracey’s cremation ashes and lock of hair. Her children requested me to play Simply Red’s Fairground as I finished the order
The SSRT is on my website and comes with these sizing mandrels. They’re USA ring sizes and start from a size 4 which is 14.8mm wide, or a UK size H or EU size 47. They have tiny steps which are half sizes, or whole UK sizes. The mandrels go up to a size 15 and a half which is 24mm in diameter, a UK size Z+6 or an EU size 76. Usually I’d mark the ring itself with an Ultra Fine Sharpie but here I’ve used some white electrical tape for three reasons. One, it protects the mandrel from resin spills, two it helps keep the ring secure and three, I can write on it.
Turn on the machine and it will start to slowly spin either clockwise or anticlockwise. If you turn it off and on again it’ll spin the other way. I’m right handed and I’ve learnt I prefer it to be anticlockwise. Do a thin layer of clear resin to give a strong bond with the silver. As always, I’m using Padico Star Drop and I’m super proud to be a Padico reseller too. Use a cocktail stick to get the resin where you want it and try not to get it over the edges. Let it spin for a minute to get the layer even.
Cure this layer under your UV lamp. I propped mine up on some foam sanding pads which were handy, but you could use a couple of cans of cola. I do a 60 second full power cure twice. Check the edge of the ring for any bits of resin and pick them off with a fingernail if you find any. Get your cremation ashes ready. I’m not mixing any birthstones or colour in because my client wanted classic ashes.
Add a very thin layer of clear resin then tap some ashes on top. You can grind them a little finer if they’re larger pieces (this depends on the cremulator, the machine used to grind the ashes at the crematorium). We sell little pestle and mortars which are perfect for ashes. I experimented here with using my tiny spoon and also the inlay tapper from Bentwood Ring Supplies and found the tapper a little easier. If you’d like me to stock these, please let me know in the comments! Wipe off any excess with a small brush or sparkle applicator.
Take a little time to get the ashes in an even layer but it doesn’t have to be perfect. Cure again twice on full power. Do another layer with ashes so you have full coverage and no silver showing through but it’s important to leave enough room for the lock of hair. I did grind the ashes a little finer this time to fill some of the gaps. Clean up the ring and cure again twice on full power and turn it off.
The SSRT comes with a silicone mat to catch the ashes underneath but I covered mine with some label backing paper, which you can order from me free of charge. I always return every SINGLE grain of ashes to the clients. You can watch my other channel ring tutorials for more ideas on adding colour and birthstones.
Next we’re going to add the lock of hair. Hair and especially fur, can be extremely tricky to get into a channel ring and the narrower the channel, the more difficult it can be. I like to laminate the hair before I begin, so there’s a neat strip to inlay. To do that, take a strip of label backing paper about the length of your hand and fold over one end like this, wrap it around the ring and fold the other end where they meet so you know the rough circumference of the band. We’re going to cut the hair just a little longer than this then perfect it at the end.
By the way, there’s a link in the description for this ring turner, or SSRT, and it’s USB powered so it will work in any country. If you’re in the USA you can order directly from Thomas at Bentwood Ring Supplies and he couldn’t be more helpful. Lay down the paper and take a piece of hair. If the hair is shorter than the ring then you can do several pieces. Lay down a line of clear resin and place the hair on top then cover it with resin and make sure it’s all soaked in. Lay a piece of clear plastic or cellophane over the top then move it around with a cocktail stick until the piece is straight. I’m planning on making a mould for this soon! Cure this for sixty seconds and peel it apart.
Whilst writing this tutorial voiceover it’s occurred to me that using a craft knife and a clear ruler would be absolutely perfect for this so I’ve just added them to my Amazon basket and I’ll leave the links below, but it didn’t occur to me before and I’ve always used scissors before. Cut the hair to the length of the folded paper and make the width a little smaller than the channel. It can be the full width if you don’t want the colour or ashes underneath to be visible.
Cut the hair at an angle then add a teeny tiny little drop of resin to the end and place it inside the channel and cure for ten seconds. That’s just to hold it still, so make sure it’s straight. Then cover the rest of the hair with clear resin and wrap it around and trim it at an angle so it’s harder to see where they meet. This method works really well for other inlay materials such as fabric and wood veneer too. It might spring back open a little but that’s ok. I’m waiting for some little silicone stirring tools that can be held in place whilst you flash cure these, which won’t stick to the resin. Cure this for another ten seconds.
Turn the SSRT back on and make sure it’s going your preferred direction. Add a thin layer of clear resin which comes just underneath the lip of the ring, so it’s not domed. Use the cocktail stick to level it out and then allow it to spin for a few minutes. Use a bit more resin in any areas which are lower or remove some where needed. This layer doesn’t need to be perfect either and is just to cap the hair
Cure it twice at full strength at sixty seconds and turn it off. Allow it to cool completely then remove the ring from the mandrel. Pick off any larger bits of resin from the sides and optionally you can use a magic silver sanding stick (green then white) or if you have deep scratches you can use a USB drill with sanding bits, working up to 5000 grit and then use a cotton polishing mop with your choice of silver polish. I like LUXI green polish but be careful the polish doesn’t touch the resin. If it does, it can leave dark marks so just sand these off, taking care not to get the silver.
For the final layer put the ring back on the SSRT and turn it on, then very carefully add a thin layer of resin. If you have it, use the Padico Star Drop UV Top Coat because it’s a little thinner than the Star Drop resin and easier to apply, but the resin works fine. Spin and perfect for a few minutes then cure three times at full power for sixty seconds and allow to cool completely before you touch it.
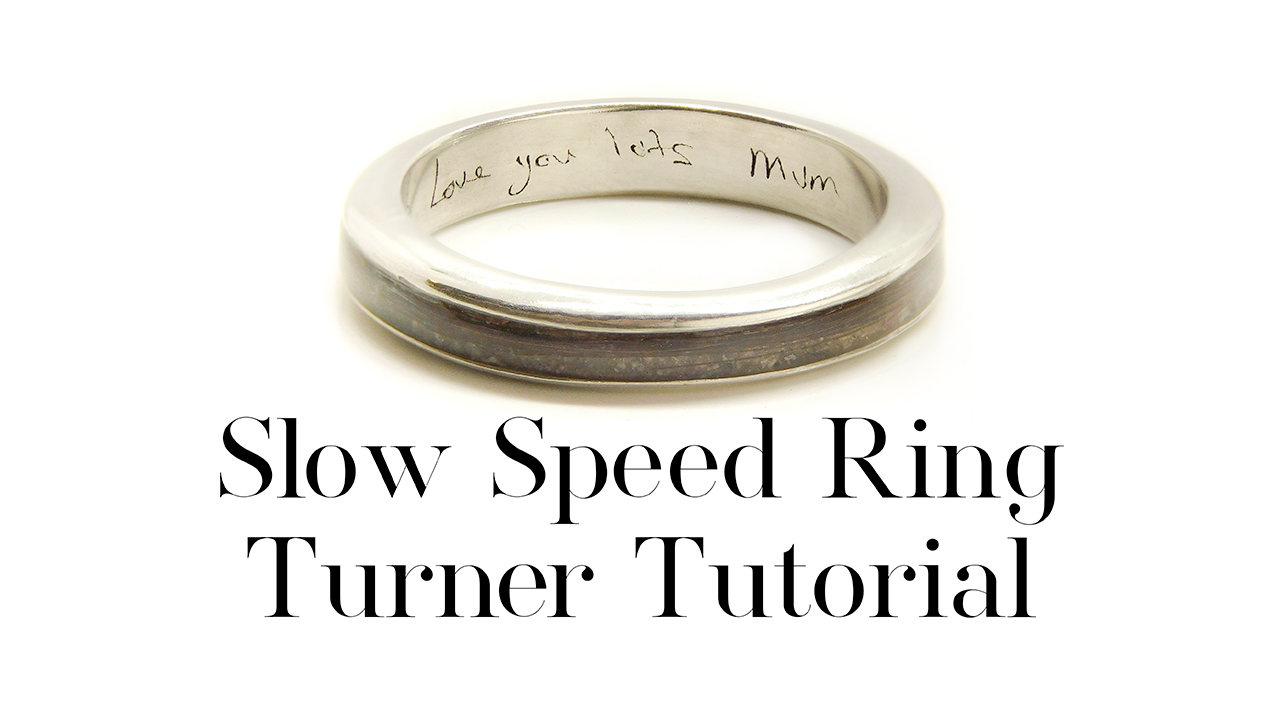
You can use the 5000 grit sanding bit inside the ring if you like but if it’s engraved, be careful not to sand too much or you can remove the engraving. This is Tracey’s handwriting to her son John which was on a birthday card. You can send me your own or your clients’ handwriting and I can engrave it on any jewellery items. Don’t forget, if you’d like to buy the supplies to make these pieces yourself they’re all on keepsakersupplies.com or if you’d like me to make you something please order on TreeofOpals.com and mention my tutorials for a little extra free gift.
I hope you’ve enjoyed this video, please subscribe to my channel and give this video a like to see more like it in the future. Now relax and do some crafting
Please note, this tutorial blog contains affiliate links, meaning I receive a small income based on your purchases from Amazon and Etsy etc. This affiliate income is really helpful to me to support my family and if you’d like to know how I set it all up please see my affiliate page here.
Nikki

