Making Hair Stones – Amethyst and White Hair Ring – making keepsake jewellery using a mould to make a stone technique (rather than a direct pour). After making the video I also made a little necklace for the client with a spare stone with a hybrid method, using a stone to do a direct pour! This is available on YouTube Shorts here or TikTok.
I’m also showing you how to work with the tiniest amount of hair and how to fix imperfections once the ring is cured. Recently I’ve created two free courses to help people learn how to make breastmilk and memorial jewellery – click here to register and take them!
The stone technique is ideal for all of our ring settings here and because you’re making several stones you can send your client a “proof photo” to check they’re happy with the design before you finish their piece.
Direct Pour Lock of Hair Ring with Bonus Stone Necklace Video
You’ll need the following supplies
- the lock of hair
- a ring setting with a closed back, like this wide band ring setting
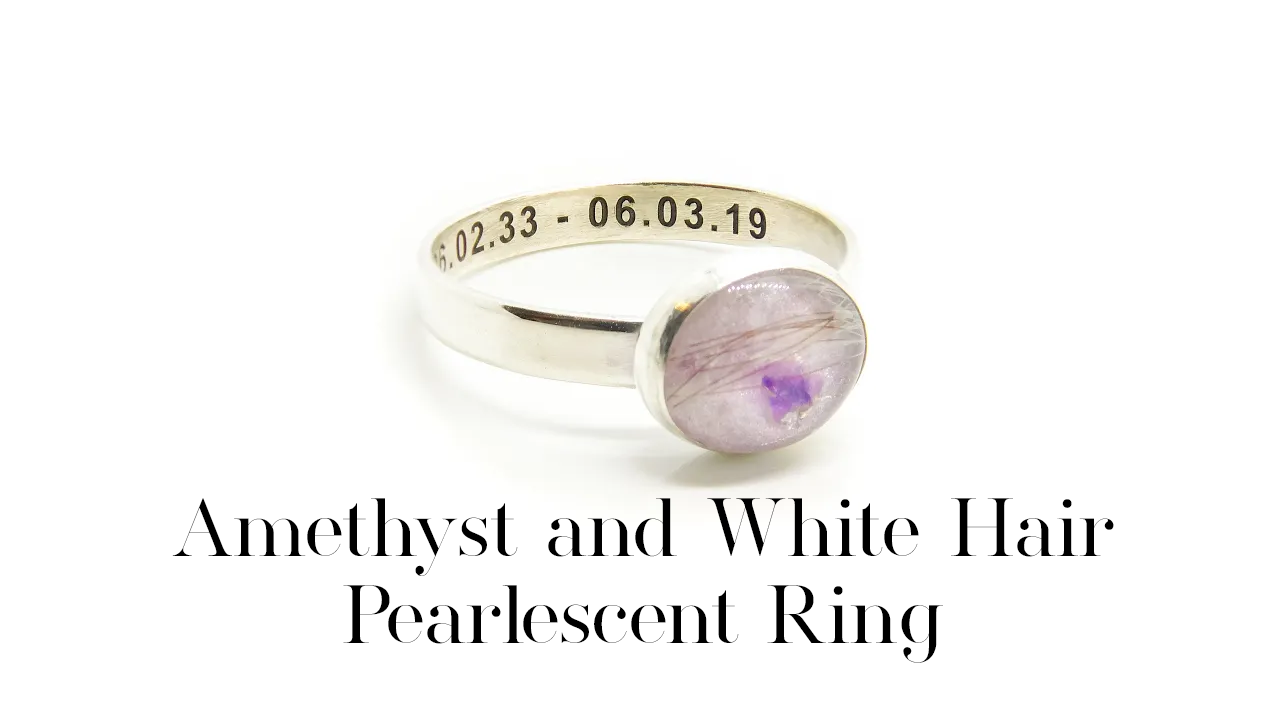
- you can add text engraving or image engraving for handwriting to this ring
- 10x8mm oval mould
- resin sparkle mix (I’m using orchid purple yet again in this video because it’s our most highly requested colour!)
- pearlescent purple resin sparkle mix (plus any out of date eyeshadow and glitters you can get from friends and family to expand your colour range)
- genuine amethyst flecks
- 3 cocktail sticks
- label backing paper
- hairdressing scissors
- tweezers
- UV resin
- UV top coat
To make the necklace you’ll also need
Tools and Equipment
- LED UV lamp to work with UV resin
- You can also use epoxy resin for these pieces but you will need to wait for the resin to cure between layers which can take days
- curved burnisher or a teaspoon
- wire cutting pliers/tin snips
- diamond file
- sandpaper
RECEIVING HAIR
This lock of hair ring is from an adult, and the family was able to send me a nice length of hair. The white strands are translucent or transparent in resin and you can only see the darker strands. If you ask your clients to put the lock of hair in a clear glass of water, you will see if it’s visible through the side. If it is, it’s probably visible in resin, if not then it’s likely to be hidden in the resin. If this is the case, manage your client expectations so they know the hair will definitely be there, even if you can’t see it.
You can always take a photo of the process to show your client that you’re adding the hair but I’ve never been asked to do this. I have heard some artists paint the hair white or dye the hair but if I were the client, I wouldn’t want this done to my loved one’s hair. So if you do a process to colour the hair, make sure the client is happy.

In this video I’m repairing a ring where the stone has been lost, so I’m making a new stone with a lock of white hair and some amethyst. This ring is an order I did for a client in 2019 in my other business, Tree of Opals, and the stone needs remaking as it was lost. I’ve linked to all the supplies I’m using in the video description, which are for sale on my website KeepsakerSupplies.com [here!]
PREPARING THE RING
I started off by inspecting the ring. It looks like it’s had a bit of a knock: the bezel cup is bent up at the side, so the first thing I did was photograph it then bend it back to shape with my fingers. Repairs like this are almost always free for my Tree of Opals clients but I ask them to cover the cost of the kit and for returning the repaired piece to them.
I used a curved burnisher to smooth out and try to flatten the sides of the bezel cup. Then I took an ultra fine foam sanding pad and took out the scratches on the band for the client. Next, I put it in the magnetic pin polisher for ten minutes, then gave it a polish with green Luxi compound and cleaned it up with a silver polishing cloth. I put the ring aside for later and began to work with the hair.
WORKING WITH THE HAIR
We ask clients to tie the lock of hair with cotton like this when possible. The lock of hair I’m using here belonged to a person who has passed away, it’s white with a few darker strands. I find that human hair that’s called “white” is usually translucent or almost transparent. We warn clients in advance that this hair might not be visible in the resin because it’s always important to manage expectations. You can get them to check first with the shotglass trick, let me know in the comments if you’d like a video about this and more examples of light blonde and white hair in resin.
Use a piece of label backing paper, then use hairdressing scissors to cut a length of hair. Make sure you don’t use up all the hair in case you need to make more stones. Add clear resin on top then smooth it over the hair with a cocktail stick. Use the scissors to cut the hair to the length you need, a little longer than the mould to allow it to curve around. Use tweezers to move the hair into the moulds and then move it around until it’s where you want it with a cocktail stick
Cut the hair if you need to or try again with longer strands.
When the hair is pretty much where you want it, add a dot more resin on top of the hair; this really helps you to be able to fish out any air bubbles. Spend plenty of time doing this and get it how you want. Try not to move the hair more than you need to because this can trap more air. Use a jeweller’s loupe or a magnifying glass if you need to see close up, and remove as many microbubbles as you can. Cure under the UV lamp for 99 seconds on a low heat setting.
ADDING COLOUR
When you’re working with anything white like white hair or breastmilk, take extra special care that your work area is clean from dust and dirt because this can show up in the piece. This client asked for purple amethyst so I decided to make four variations of purple to give her a choice. I put four dots of resin onto some label backing paper and onto each added colour:
our Pearlescent Purple Resin Sparkle Mix
Orchid Purple Resin Sparkle Mix
Some expired lilac eyeshadow I’ve powdered
And a purple glitter mix I’d made for a different project
Mix together each separate colour with resin and this is your palette. Add a tiny drop of clear resin into each mould on top of the hair and be careful not to squeeze the mould or the first layer may lift and new resin can get underneath. Put a little of each coloured resin into the mould with the clear resin and gently swirl. The Pearlescent Purple Resin Sparkle Mix is a kind of mica also known as a “ghost” pigment, it looks white at first glance and colourshifts to a glorious purple when it catches the light. Cure again for 99 seconds on a low heat setting.
In the next layer you can add more of the coloured resin without adding any clear, then cure again. If you’re enjoying this video please consider subscribing to my channel or following me. Keep working in very thin layers until you’ve filled the mould, curing each time. After the final layer, add some top coat to the back of all the stones, cure again and cool
SENDING PROOF PHOTOS
You can send the client a proof photo by writing numbers onto a small plate or an upside down rammekin like I use here, then numbering each stone. If you’d like a video about sending proof photos and making mystery pieces for extra income please let me know in the comments. The client let me know that she liked the Pearlescent Purple best but would it be possible to add some genuine amethyst to the stone. This is the birthstone for February and these days I usually offer birthstone colours rather than stones themselves but I’m happy to include them if a client asks.
I got out the label backing paper with the colours again. I had some small pieces of amethyst I’ve crushed and put them aside too. This is the colour blend my client liked, I think the colour is perfect and since filming she has asked me to make this stone into a necklace too! This time I blended the colours on the label backing paper. There was still plenty of hair left to make several stones but I decided to make just one. I try to be careful to save any strands that have fallen when I cut the hair.
ADDING BIRTHSTONES
To add a birthstone to a resin stone, add the resin to the hair and cut it, then put it in the mould as usual. A water clear mould is necessary for UV resin, but helpful even with epoxy so you can check the placement of the hair, stones and colour. Add a small drop of resin to the hair and double check the placement, then add a small piece of the birthstone. When you’re happy with the look of the stone so far, cure in the UV lamp.
Add a little clear resin then add some of the coloured resin to it and swirl. You can see from the back that the amethyst shows up beautifully next to the hair
Cure again and clean up your workstation. I like to put the client’s spare stones in a little cellophane bag to return them. And you can use this time to clean your scissors, tweezers and work area with a biodegradable baby wipe. I put my scissors and tweezers under the lamp too, to cure any sticky resin residue and afterwards I’ll sand it off.
In the next layer, just add coloured resin with no clear, but make sure it’s not too thick or it won’t cure. This lamp is the SUN3 UV lamp and I find it’s a bit quicker than the cheaper lamps and I like that pieces don’t get too hot with the 99 second setting. However, more basic lamps are also fine for making UV resin pieces!
Keep adding thin layers of colour until the mould is filled and use top coat on the final layer.
Remove the stone from the mould and check you’re happy – I absolutely love how this stone came out. The client had told me not to worry about a new proof photo, she trusted my work and we had a wonderful chat. I’m always grateful to my Tree of Opals clients who give permission for me to film and if you’d like a piece of memorial jewellery you can visit TreeOfOpals.com
Snip off the excess resin, you can use tin snips like these or your hairdressing scissors. Then you can use a low grit sandpaper, like 80 or 120 grit, to even out the edges. I like to use a diamond file like this to get more accuracy. Clean the stone with a piece of fabric then use a UV top coat to add a shiny, sticky free coating
This isn’t always necessary but this stone had a teeny imperfection where the amethyst was.
SETTING THE STONE
Because this ring was a repair I really struggled to get the stone back in and had to sand it more and more until it would fit in the bezel cup, but I got there in the end! Put the ring in a ring clamp and place the stone inside. There’s a sweet spot when it comes to bezel height and stone height, you will get used to how tall the ideal stone should be to go well in a rubover bezel setting.
I rubbed over the setting but if it were to come loose I would replace the whole bezel cup next time. I didn’t this time because the cup was still in good condition. I have other videos with more detail on setting a stone with a rubover smooth wall bezel. Here’s the finished ring and I hope you liked my video
This is part of my Advanced Memorial Jewellery course on KeepsakerSupplies.com
Don’t forget to like, subscribe and hit the bell on YouTube to get notifications about when I post other videos.
Now relax and do some crafting
Please note, this blog contains affiliate links, meaning I receive a small income based on your purchases from Amazon and Etsy etc. This affiliate income is really helpful to me to support my family and if you’d like to know how I set it all up please get in touch (blogs coming soon!).
Nikki
pronouns – they/them